¶ Introduction
The V-VAC Mobile App is an extension of the V-VAC Web Application, designed to provide users with convenient mobile access to their configured IoT monitoring system.
Through the mobile app, users can view assigned projects or locations, monitor live data, check alerts, analyse trend graphs, and access reports from anywhere. The app helps users stay updated on important parameters and abnormal conditions without depending only on the desktop dashboard.
All device integration, dashboard creation, configuration, and major platform setup activities are managed through the V-VAC Web Application. The mobile app is mainly intended for monitoring, review, and quick access to already configured data.
¶ App Installation
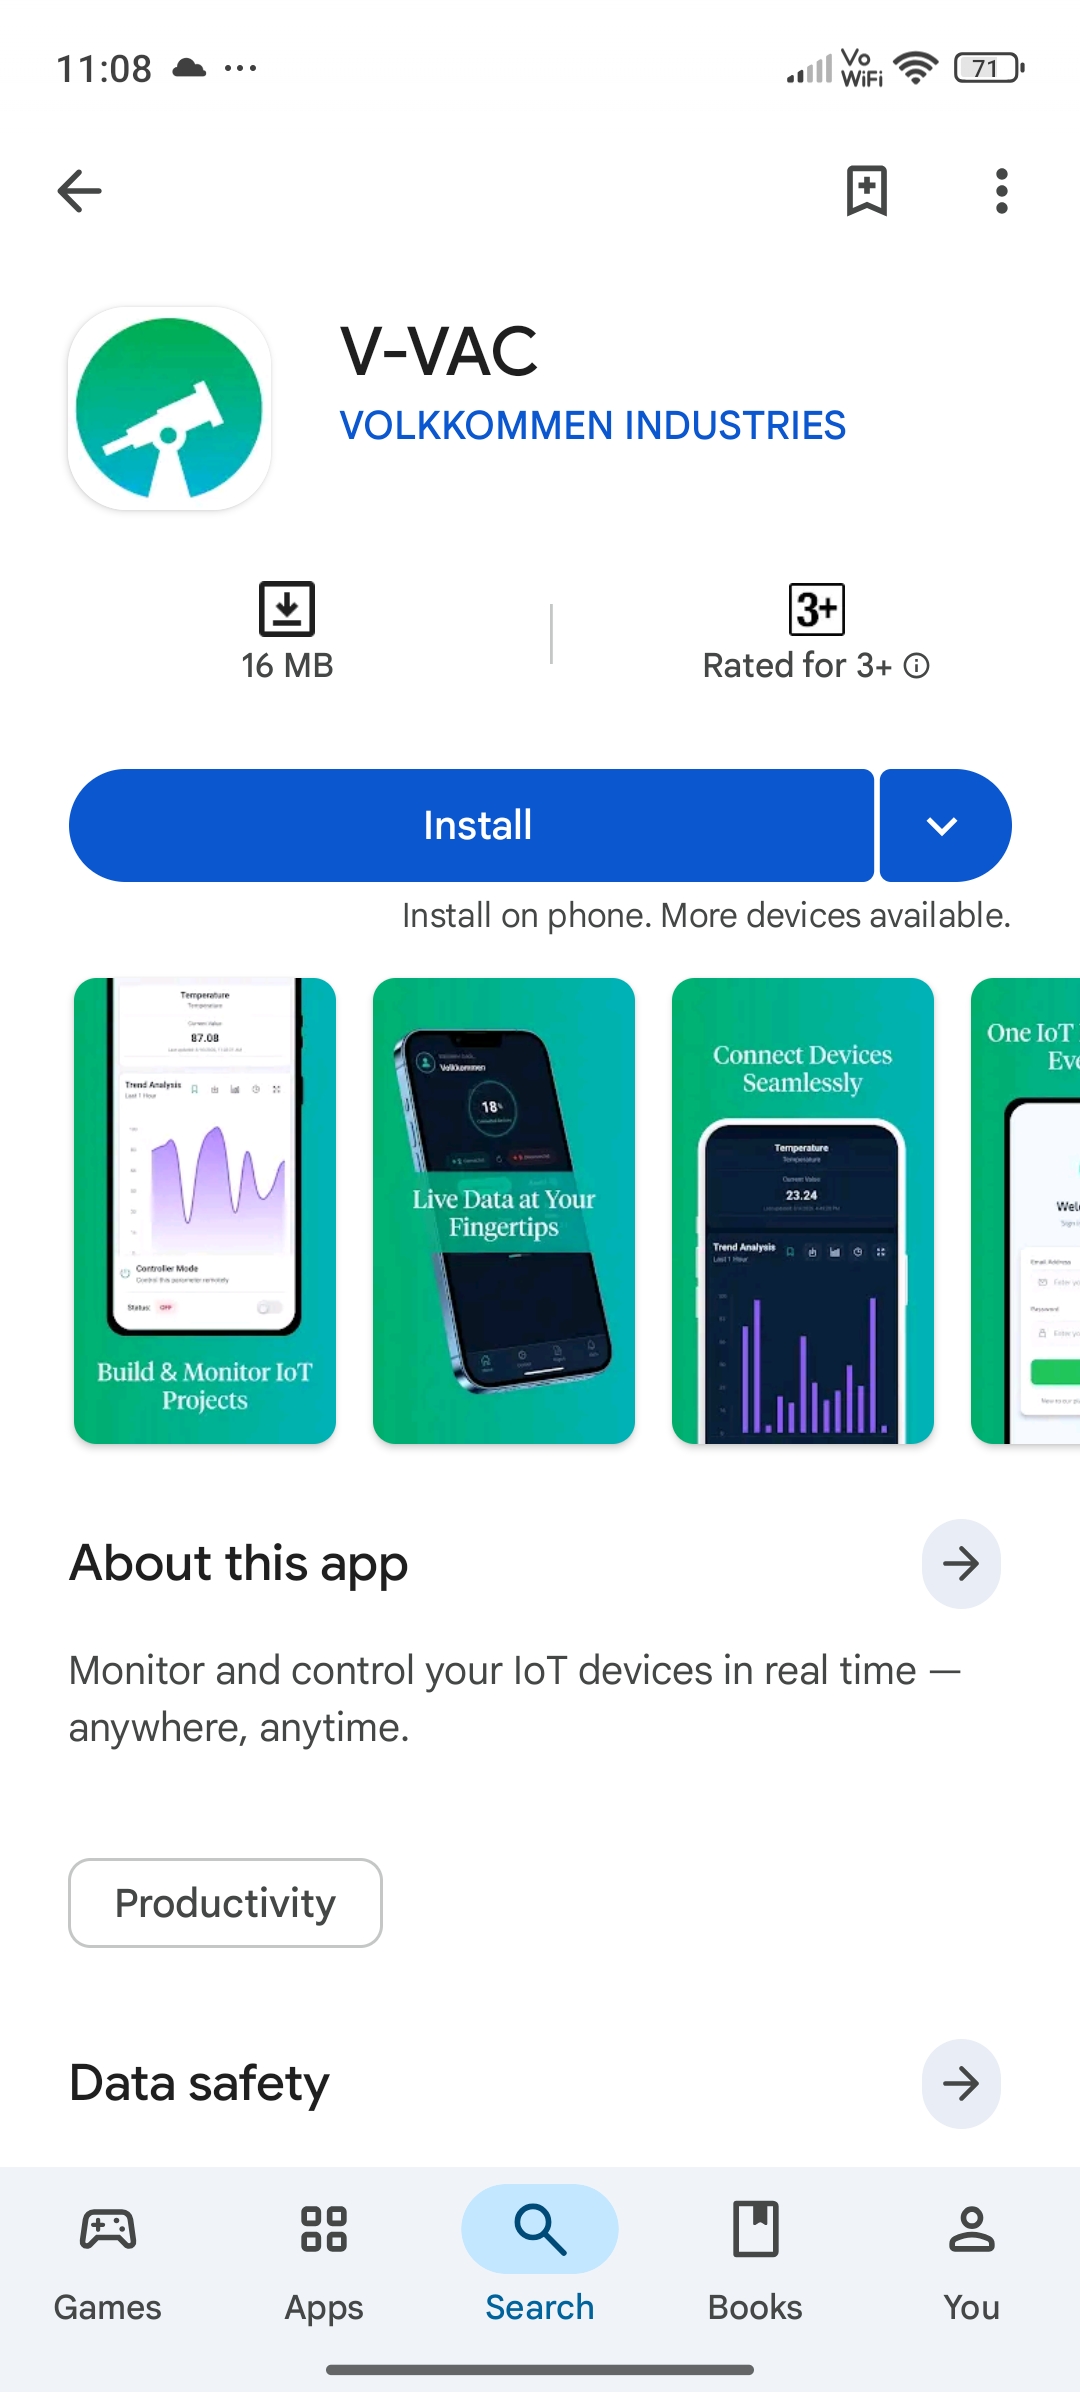
The V-VAC Mobile App is available on the Google Play Store.
Users can install the app by searching for “V-VAC” in the Play Store or by using the link below:
Google Play Store URL:
https://play.google.com/store/apps/details?id=com.volkkommen.vvac&hl=en_IN
After installation, open the app and sign in with the email address and password registered through the V-VAC Web Application.
¶ Getting Started
After installing the V-VAC Mobile App, open the app on your mobile device.
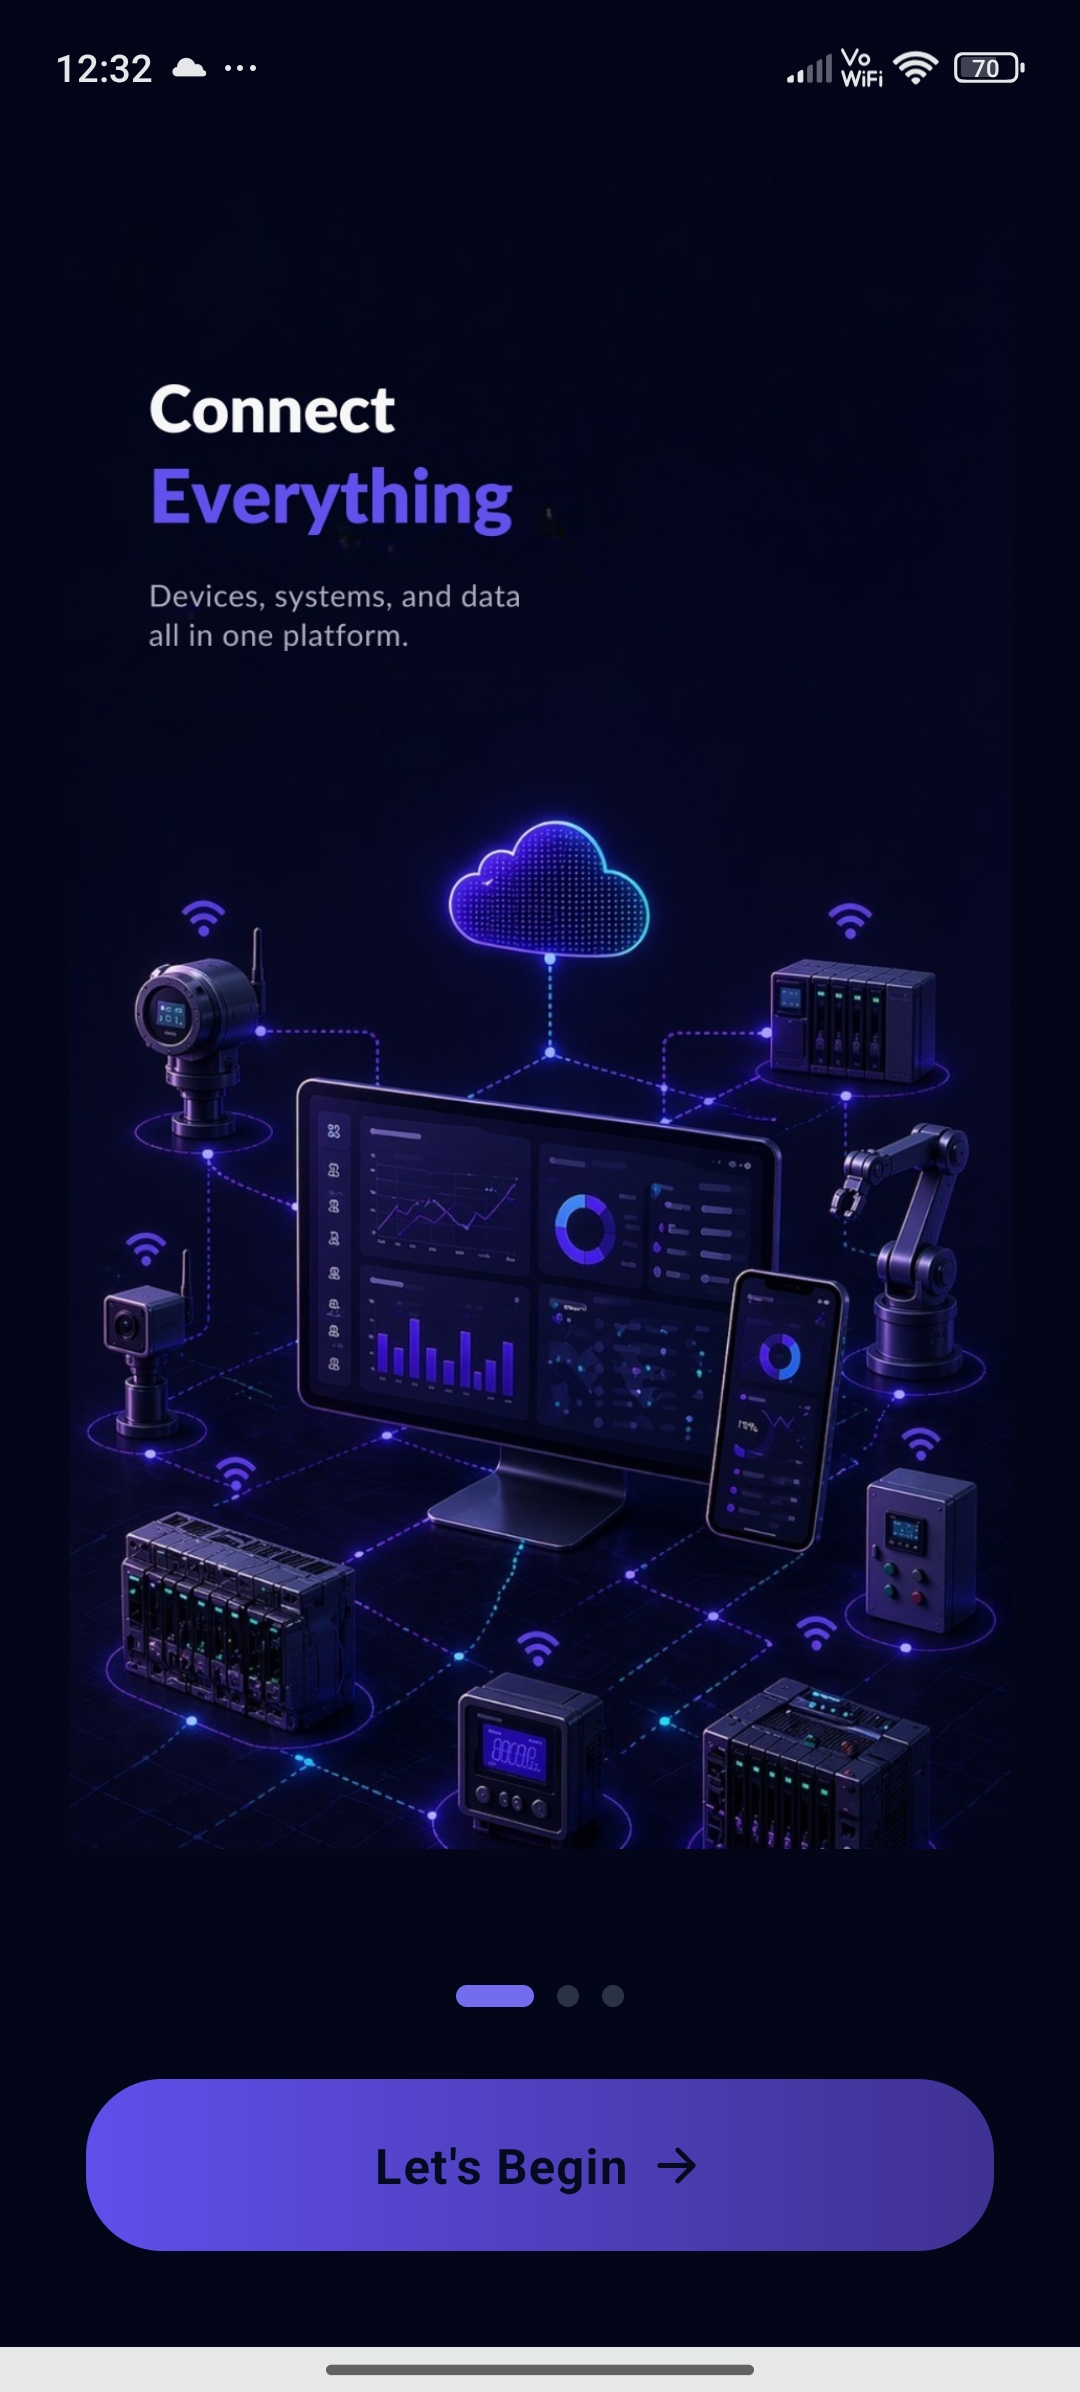
The first screen displays the V-VAC welcome page with the Let’s Begin button. Tap Let’s Begin to continue to the login screen.
¶ Login
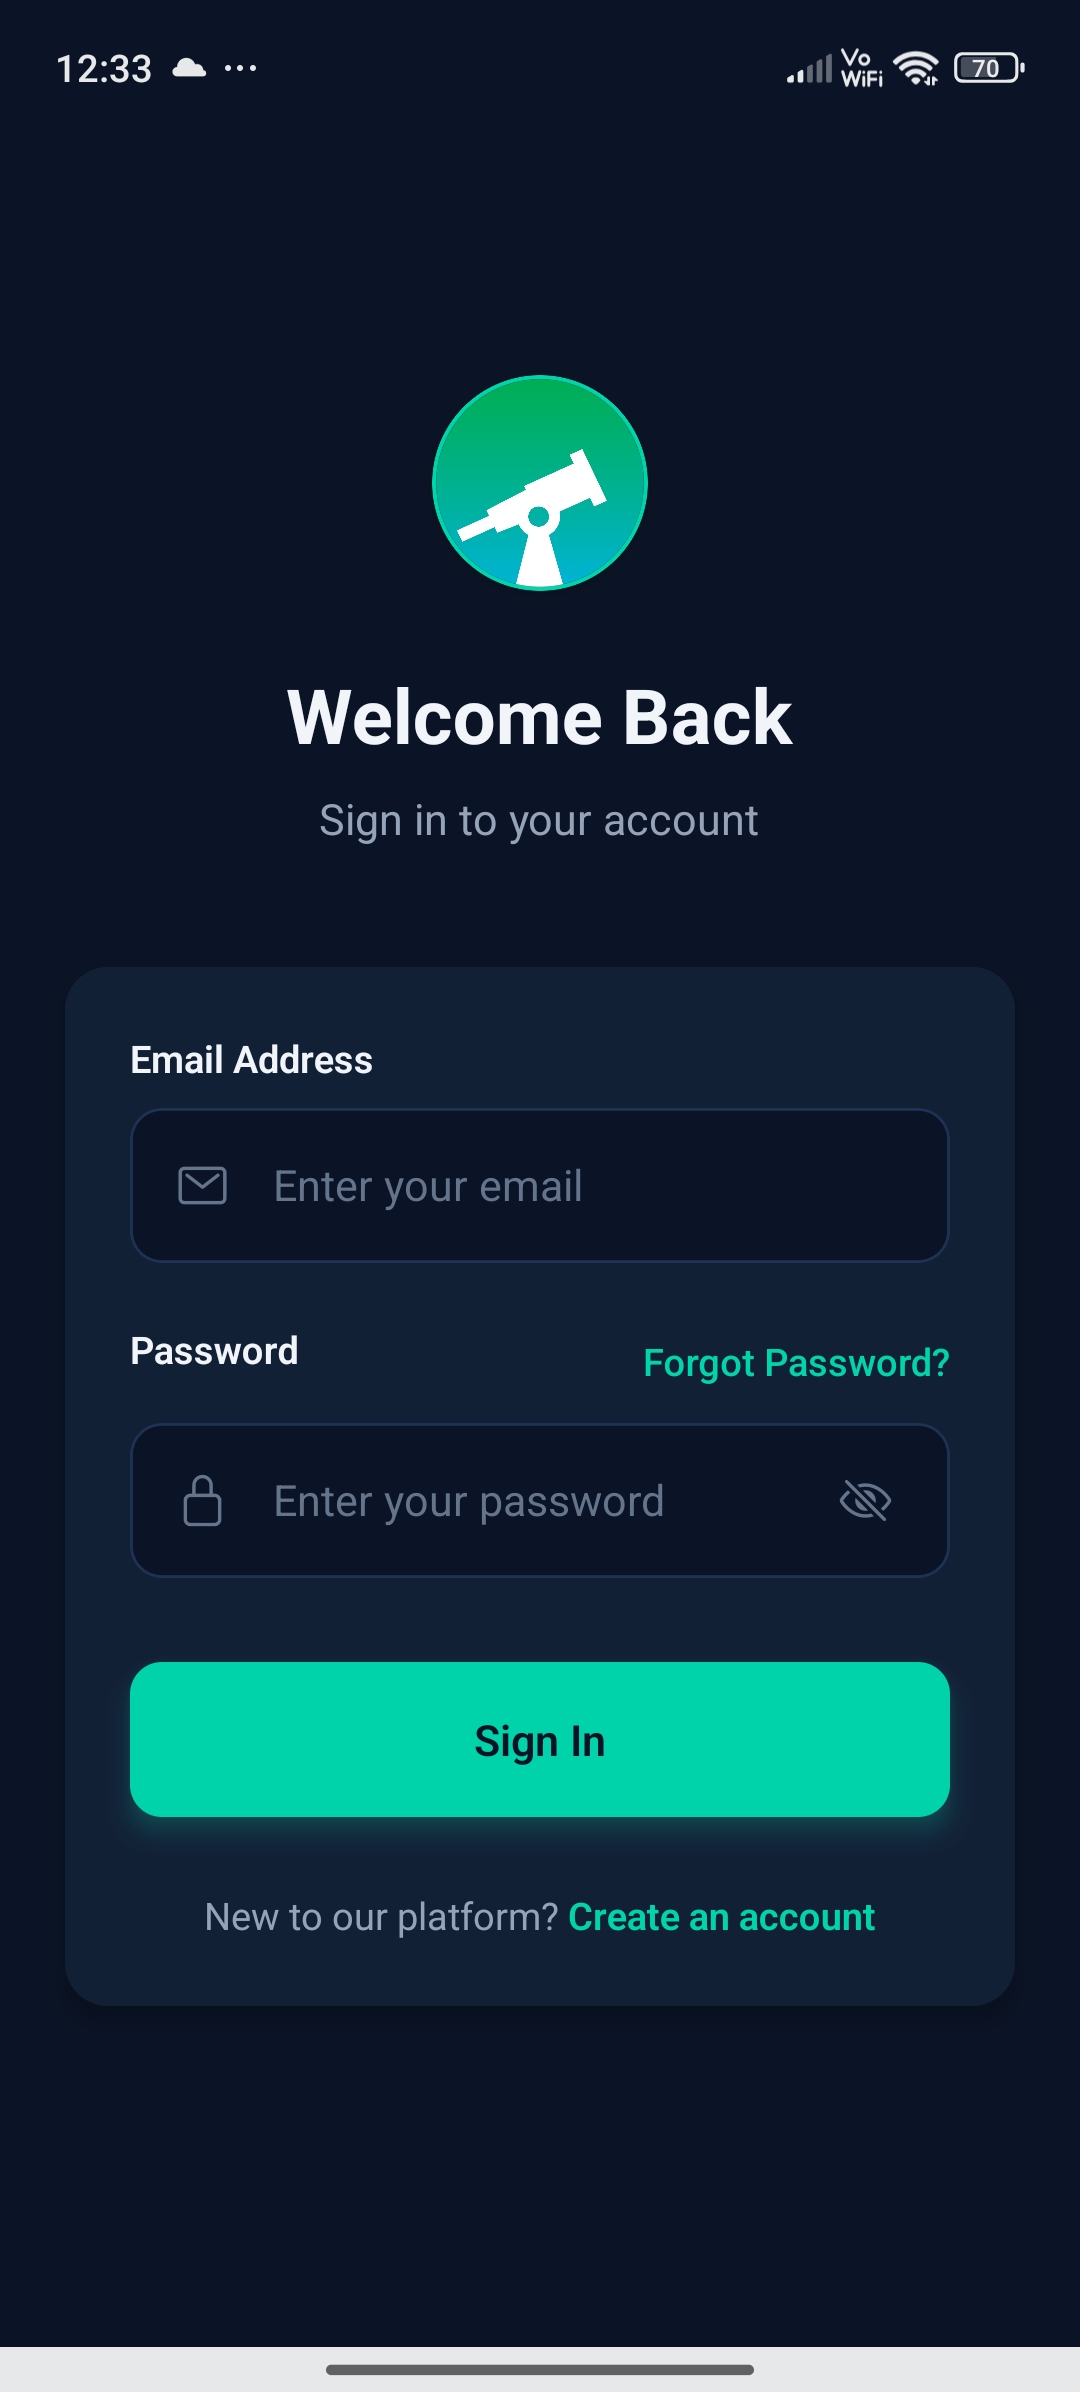
The login screen allows existing users to access their assigned V-VAC account. Enter the registered Email Address and Password, then tap Sign In. After successful login, the app will open the user’s assigned dashboard, projects, or locations based on the access provided. If the password is not available or does not work, use the Forgot Password? and reset using through email.
¶ Create an Account
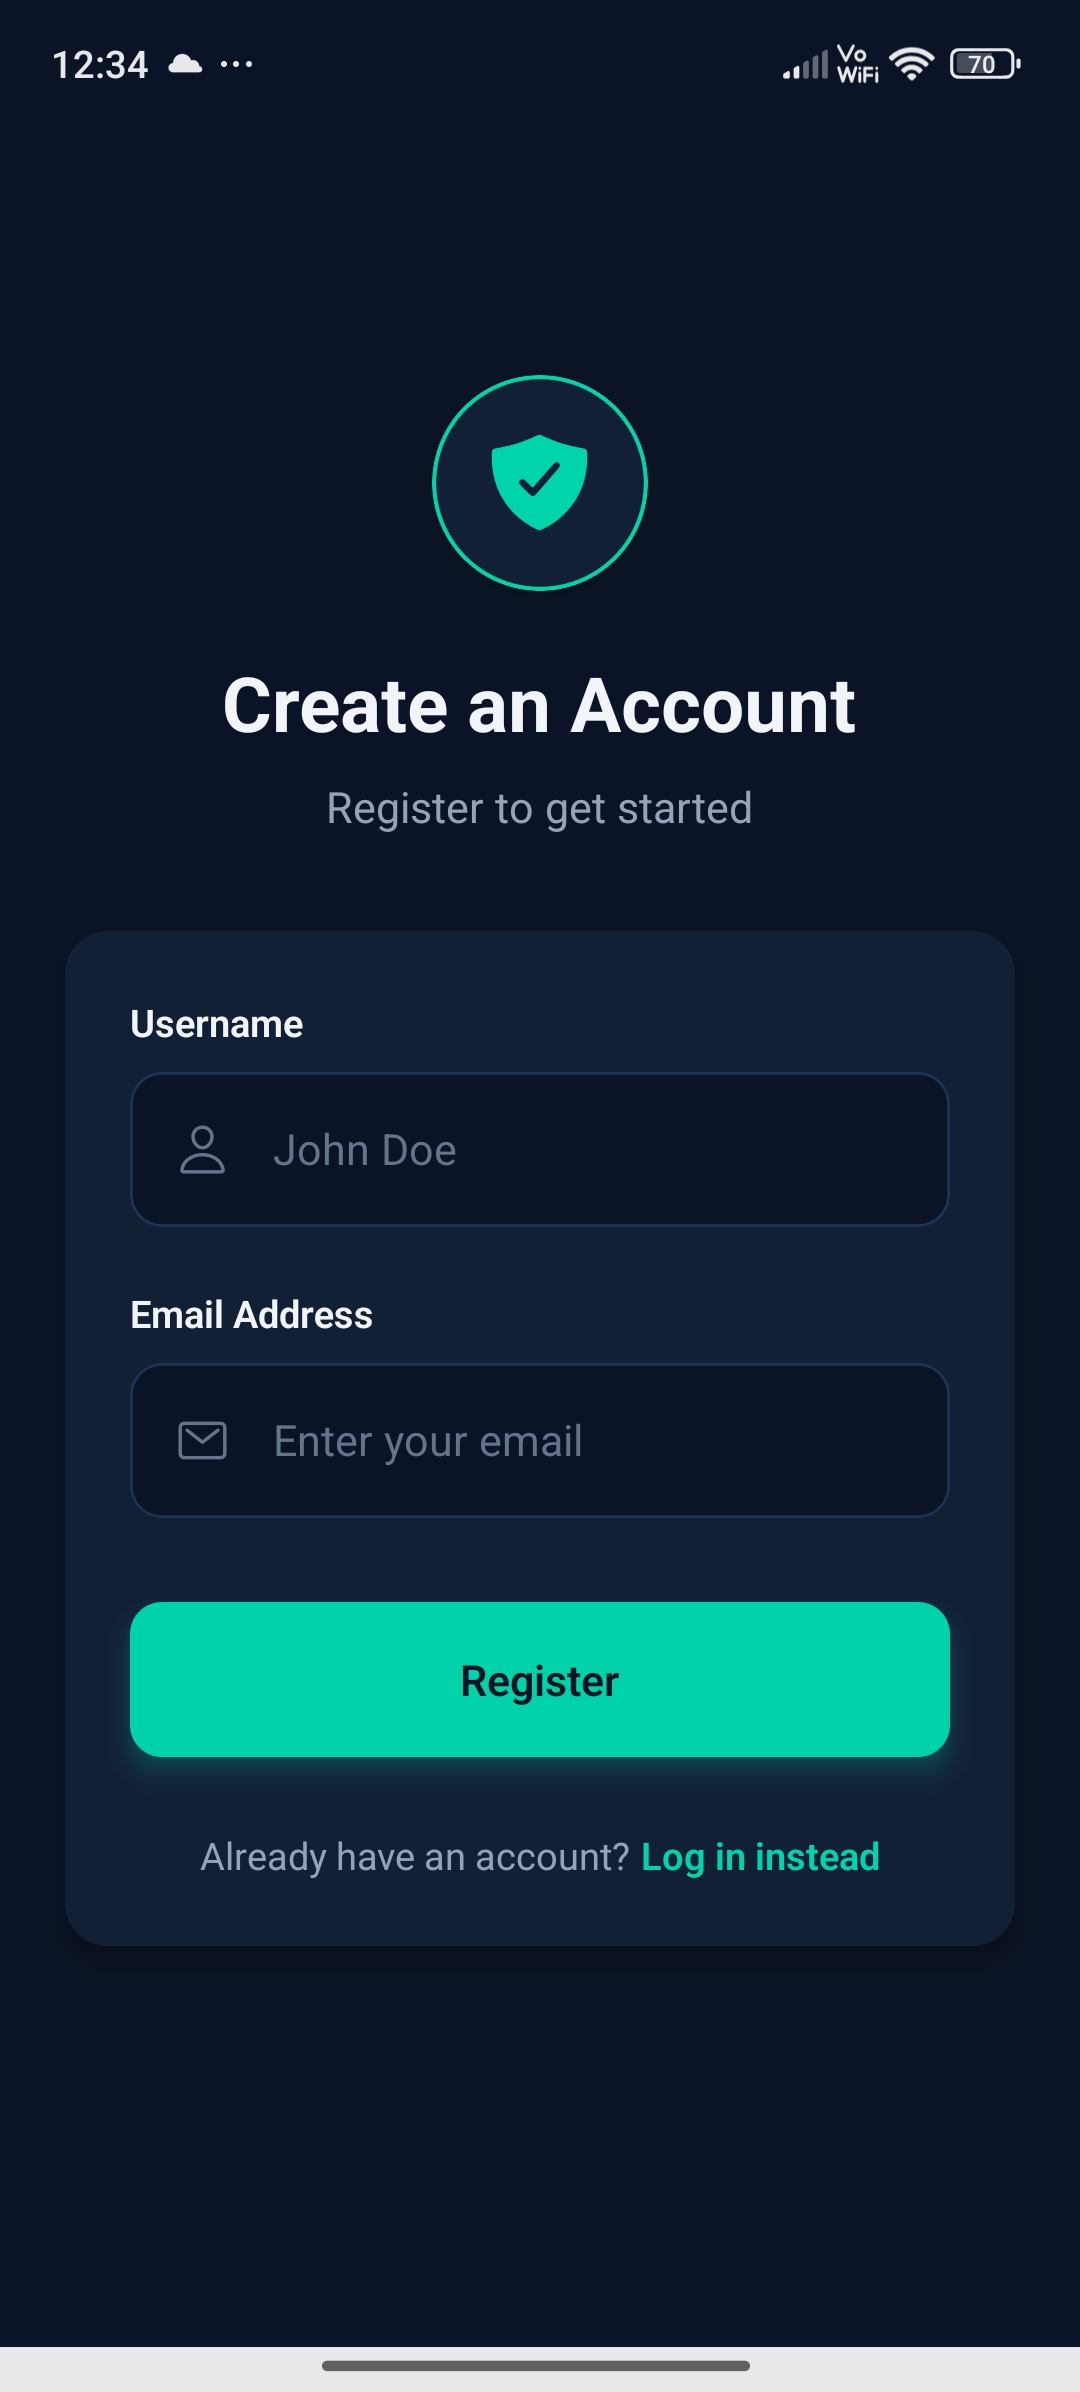
New users can start the registration process from the mobile app by tapping Create an account on the login screen.
Enter the required details:
- Username
- Email Address
Then tap Register.
¶ Email Verification and Password Setup
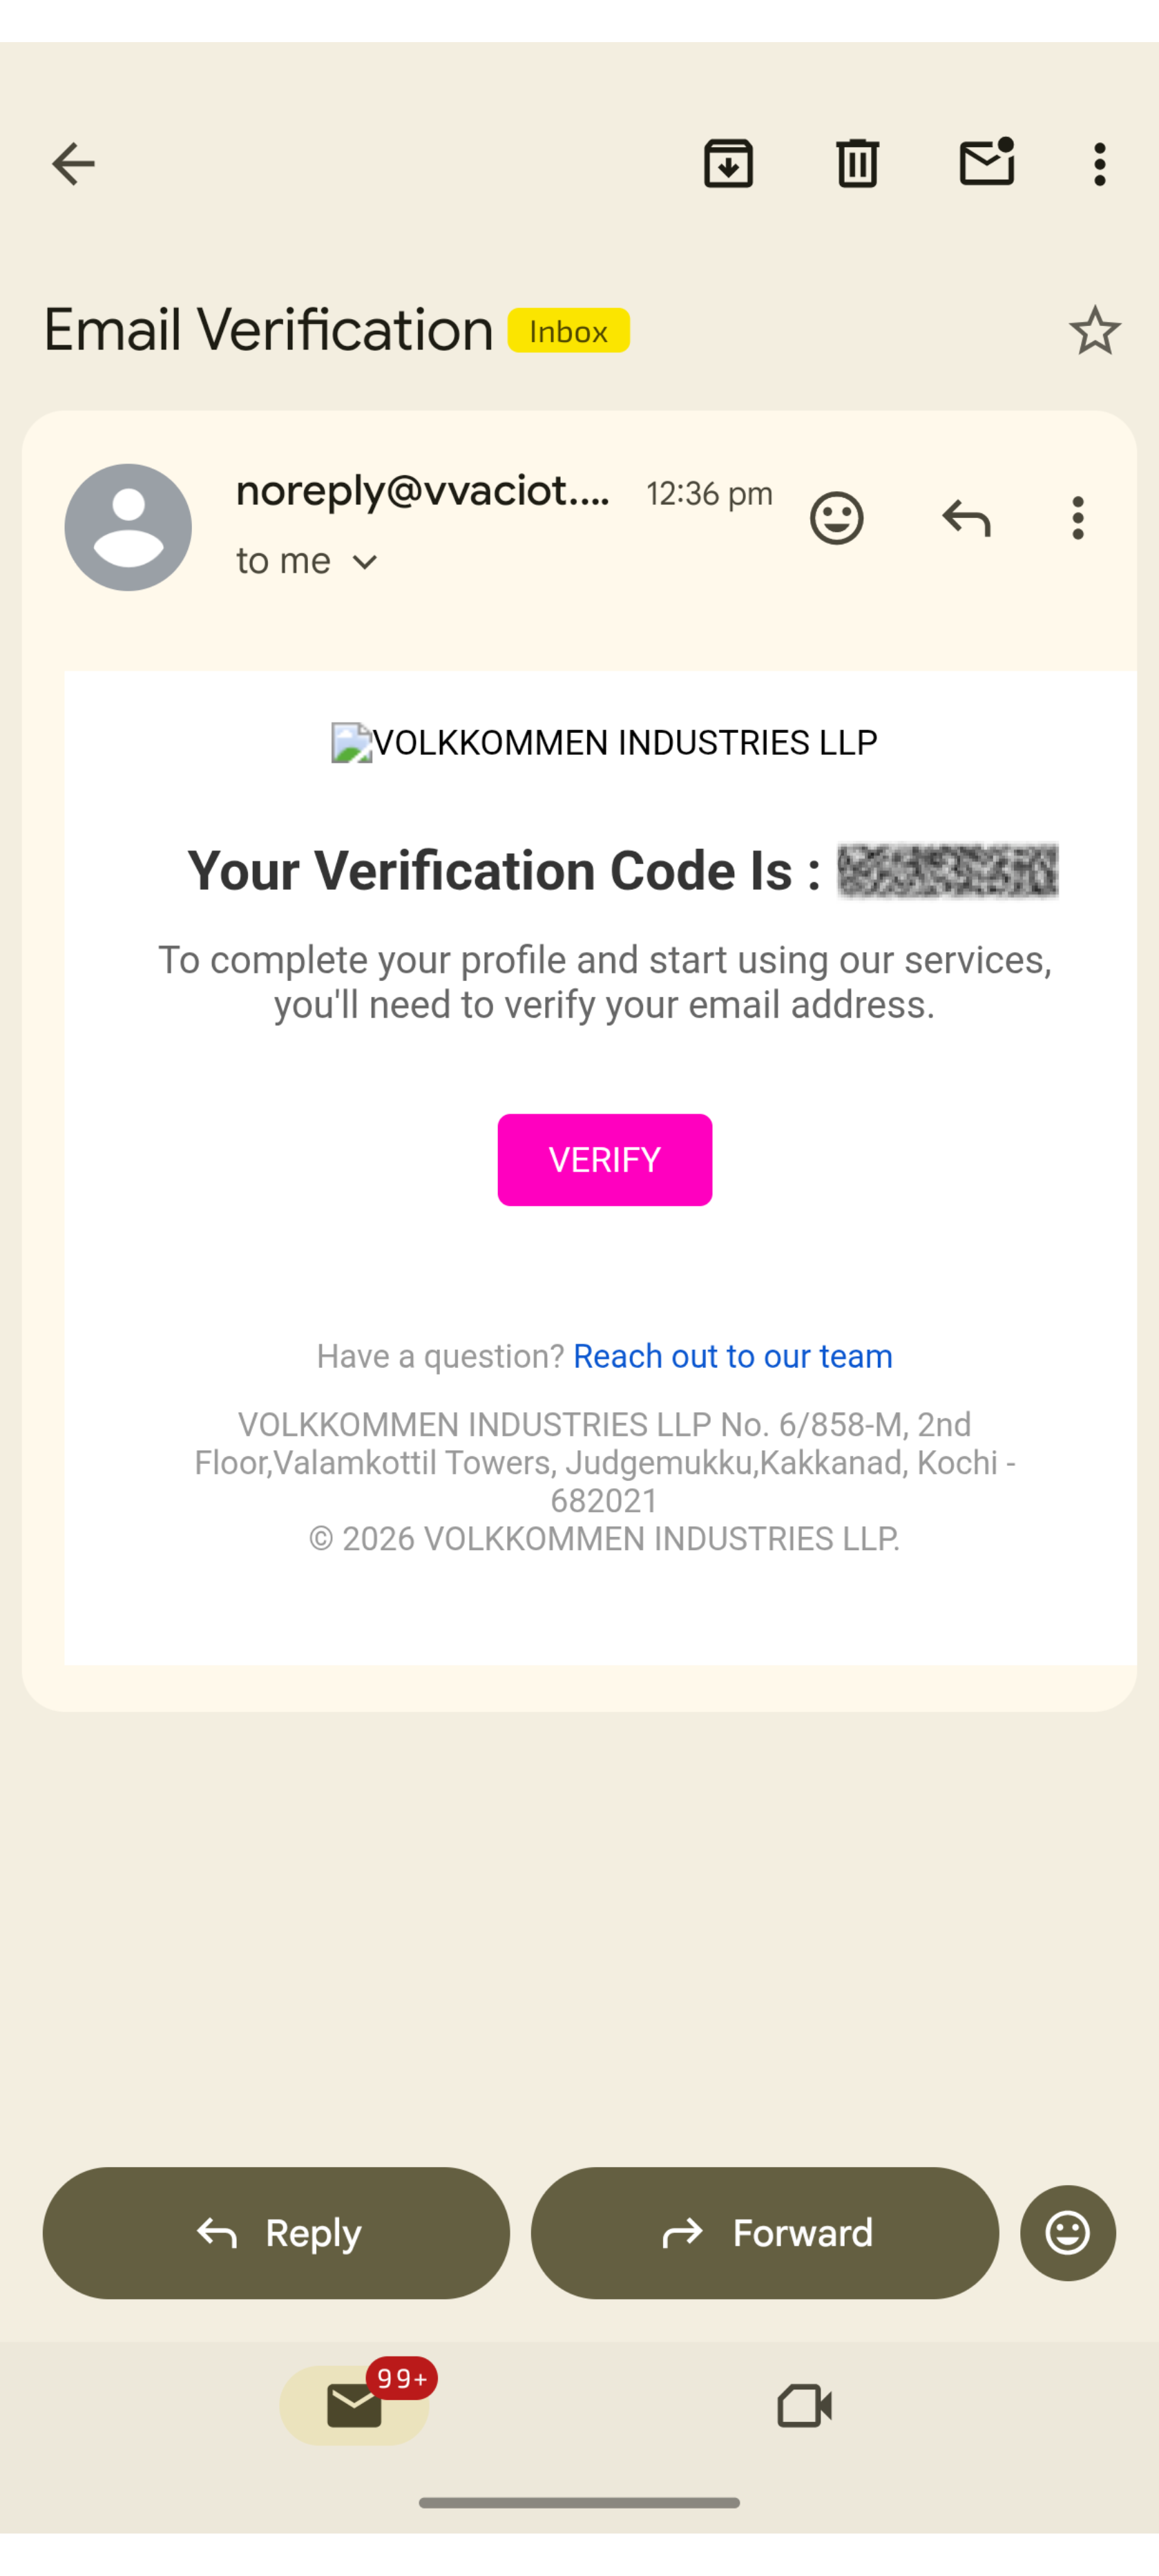
After clicking Register button from the V-VAC Mobile App, a verification email will be sent to the registered email address.
Open the email with the subject Email Verification from V-VAC. The email will include a verification code and a Verify button.
Tap Verify to open the V-VAC Web Application password setup page.
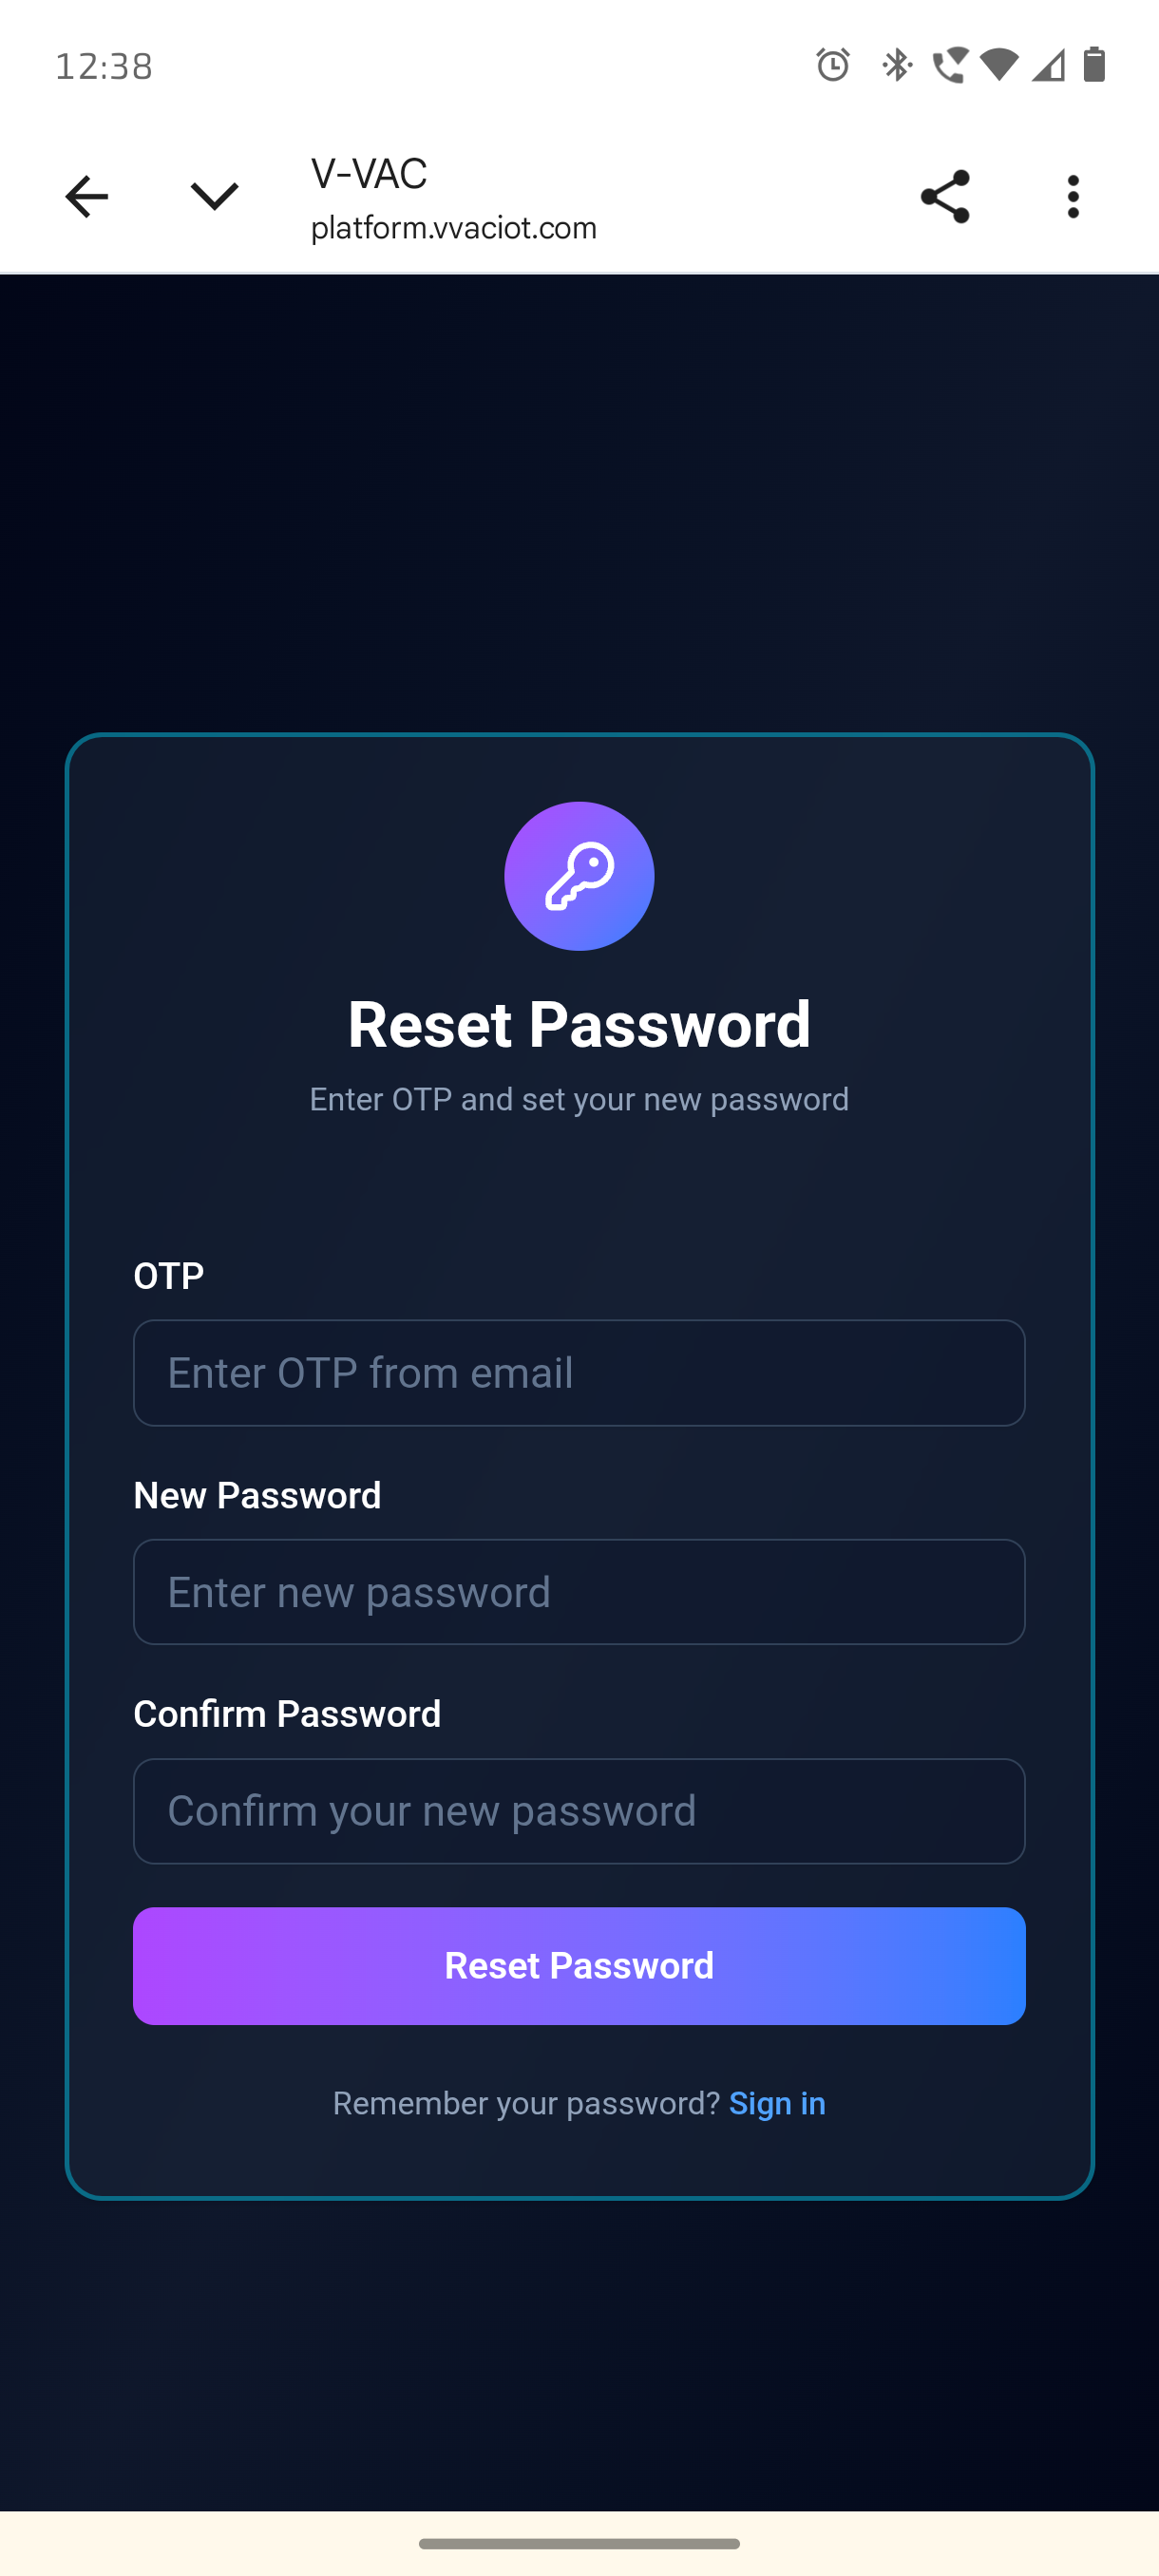
On the password setup page, enter the following details:
- OTP received in the verification email
- New Password
- Confirm Password
After entering the details, tap Reset Password.
Once the password is successfully set, return to the V-VAC Mobile App and sign in using the registered email address and the newly created password.
Note: The password setup is completed through the V-VAC Web Application, not directly inside the mobile app.
¶ Important Note for New Accounts
A newly created account will not automatically display dashboards, devices, widgets, or live data. Device integration, dashboard creation, widget configuration, parameter mapping, and user access permissions are managed through the V-VAC Web Application. After the required setup is completed in the web application, the same account can be used to log in to the V-VAC Mobile App. The mobile app will then display the assigned devices, dashboards, reports, alarms, and parameter data.
¶ Main App Navigation
After successful login, users can access the main sections of the V-VAC Mobile App from the bottom navigation panel.
The available sections are:
- Home
- Devices
- Report
- Alerts
¶ Home Page
After successful login, the Home page gives a quick overview of the logged-in account and assigned devices.
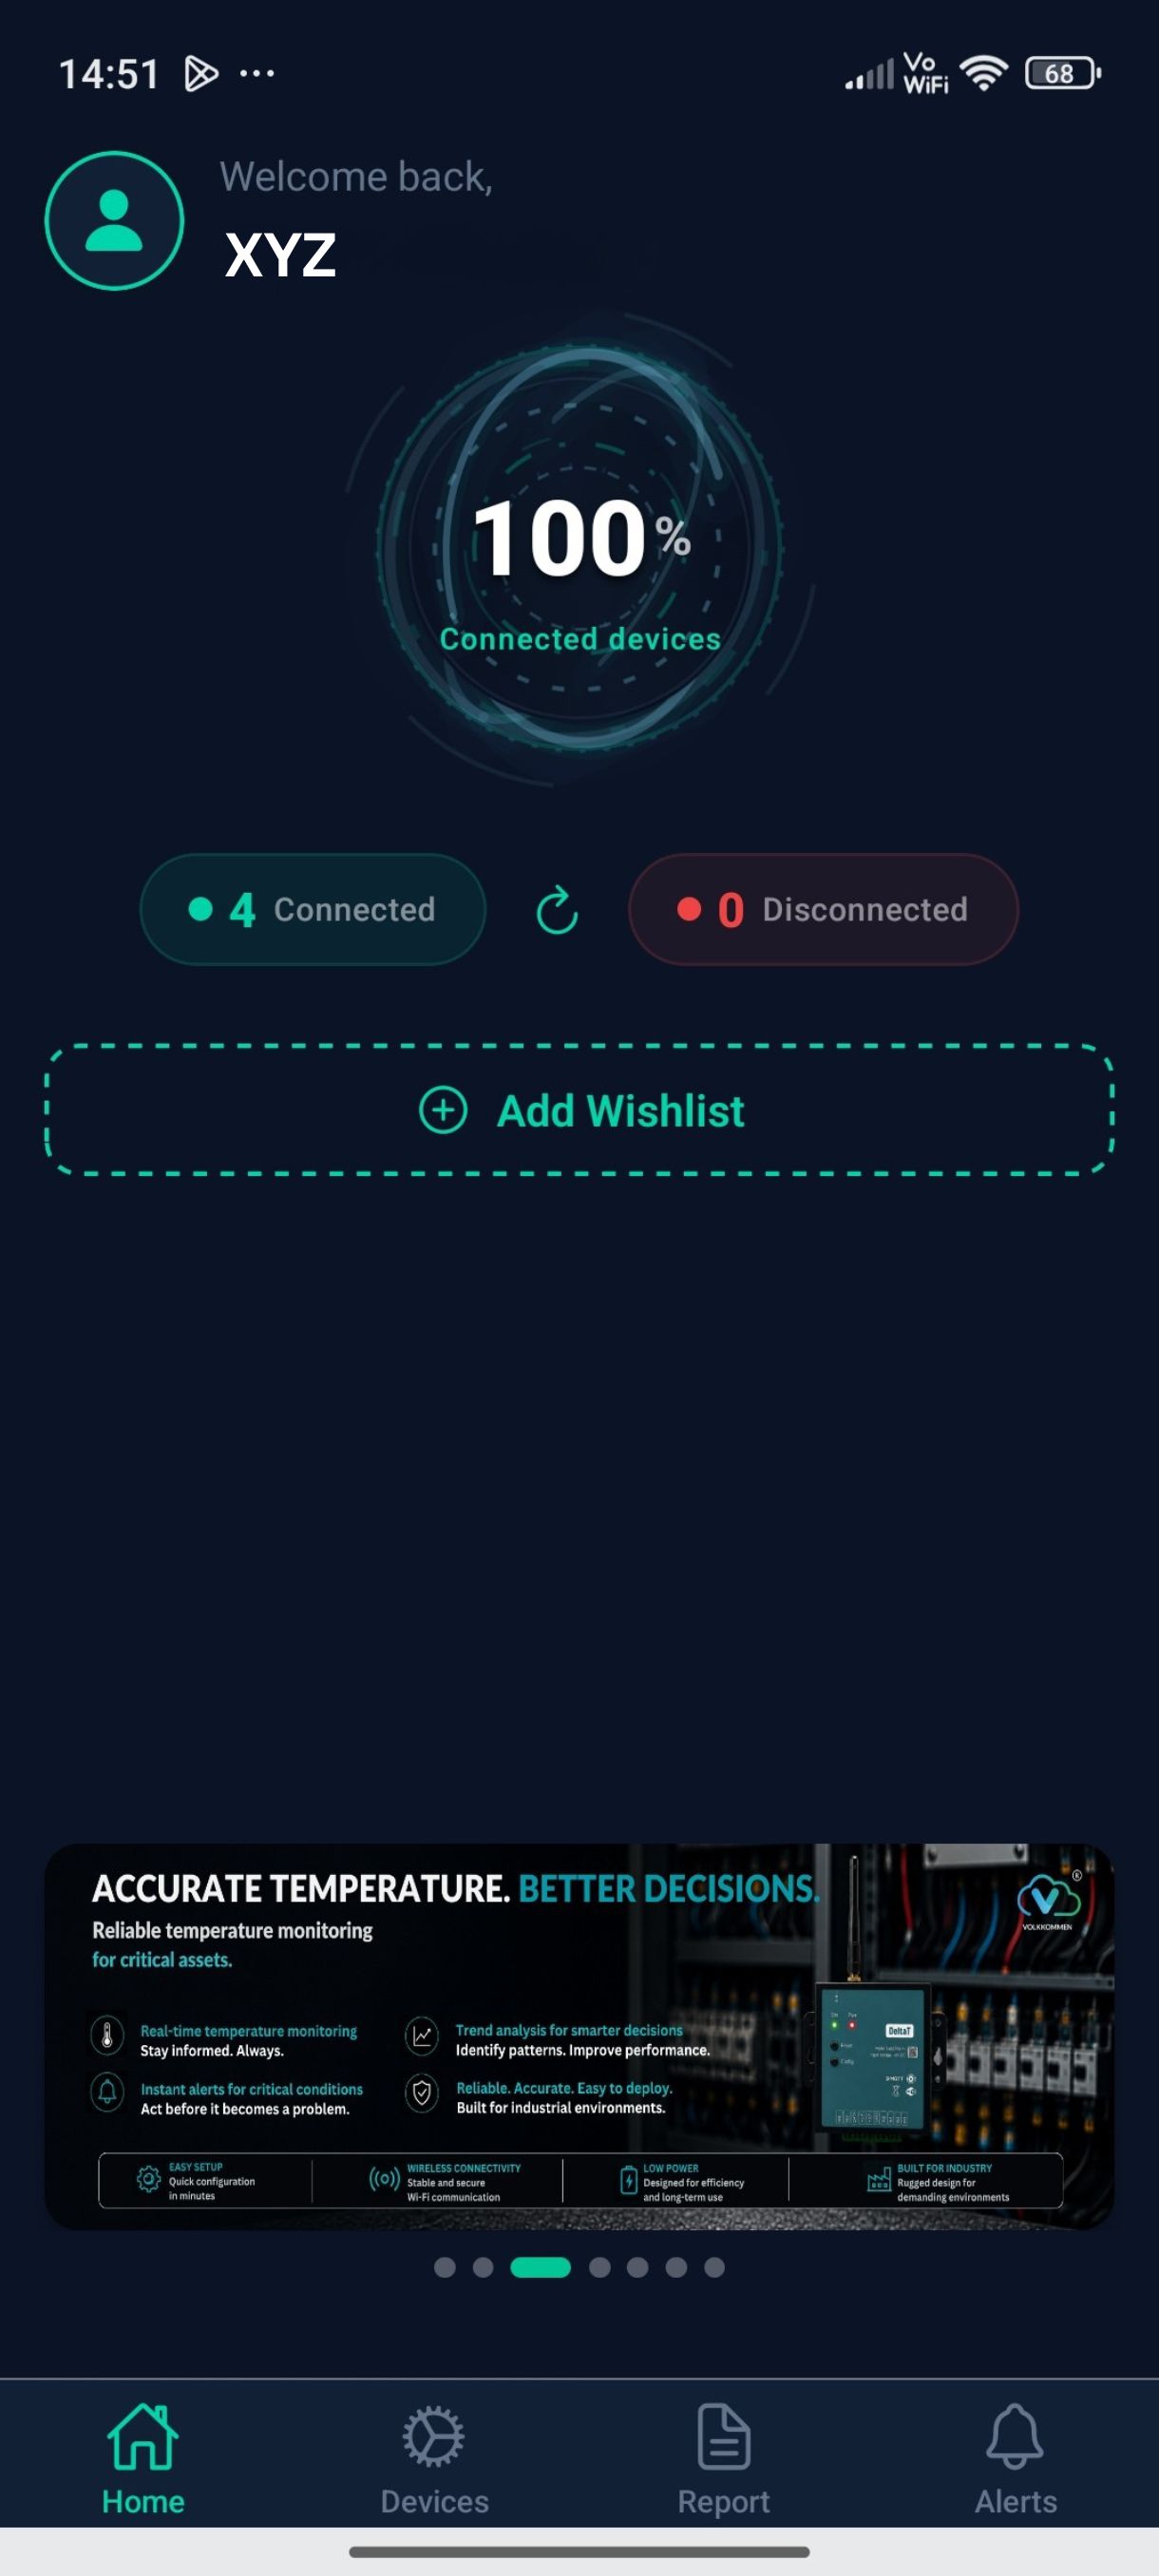
Users can view the account name, connected device percentage, connected device count, and disconnected device count. This helps users quickly understand whether the assigned devices are currently communicating with the platform.
- Connected indicates devices that are online and sending data to the platform.
- Disconnected indicates devices that are offline or not currently communicating.
- The refresh icon can be used to update the latest device connection status.
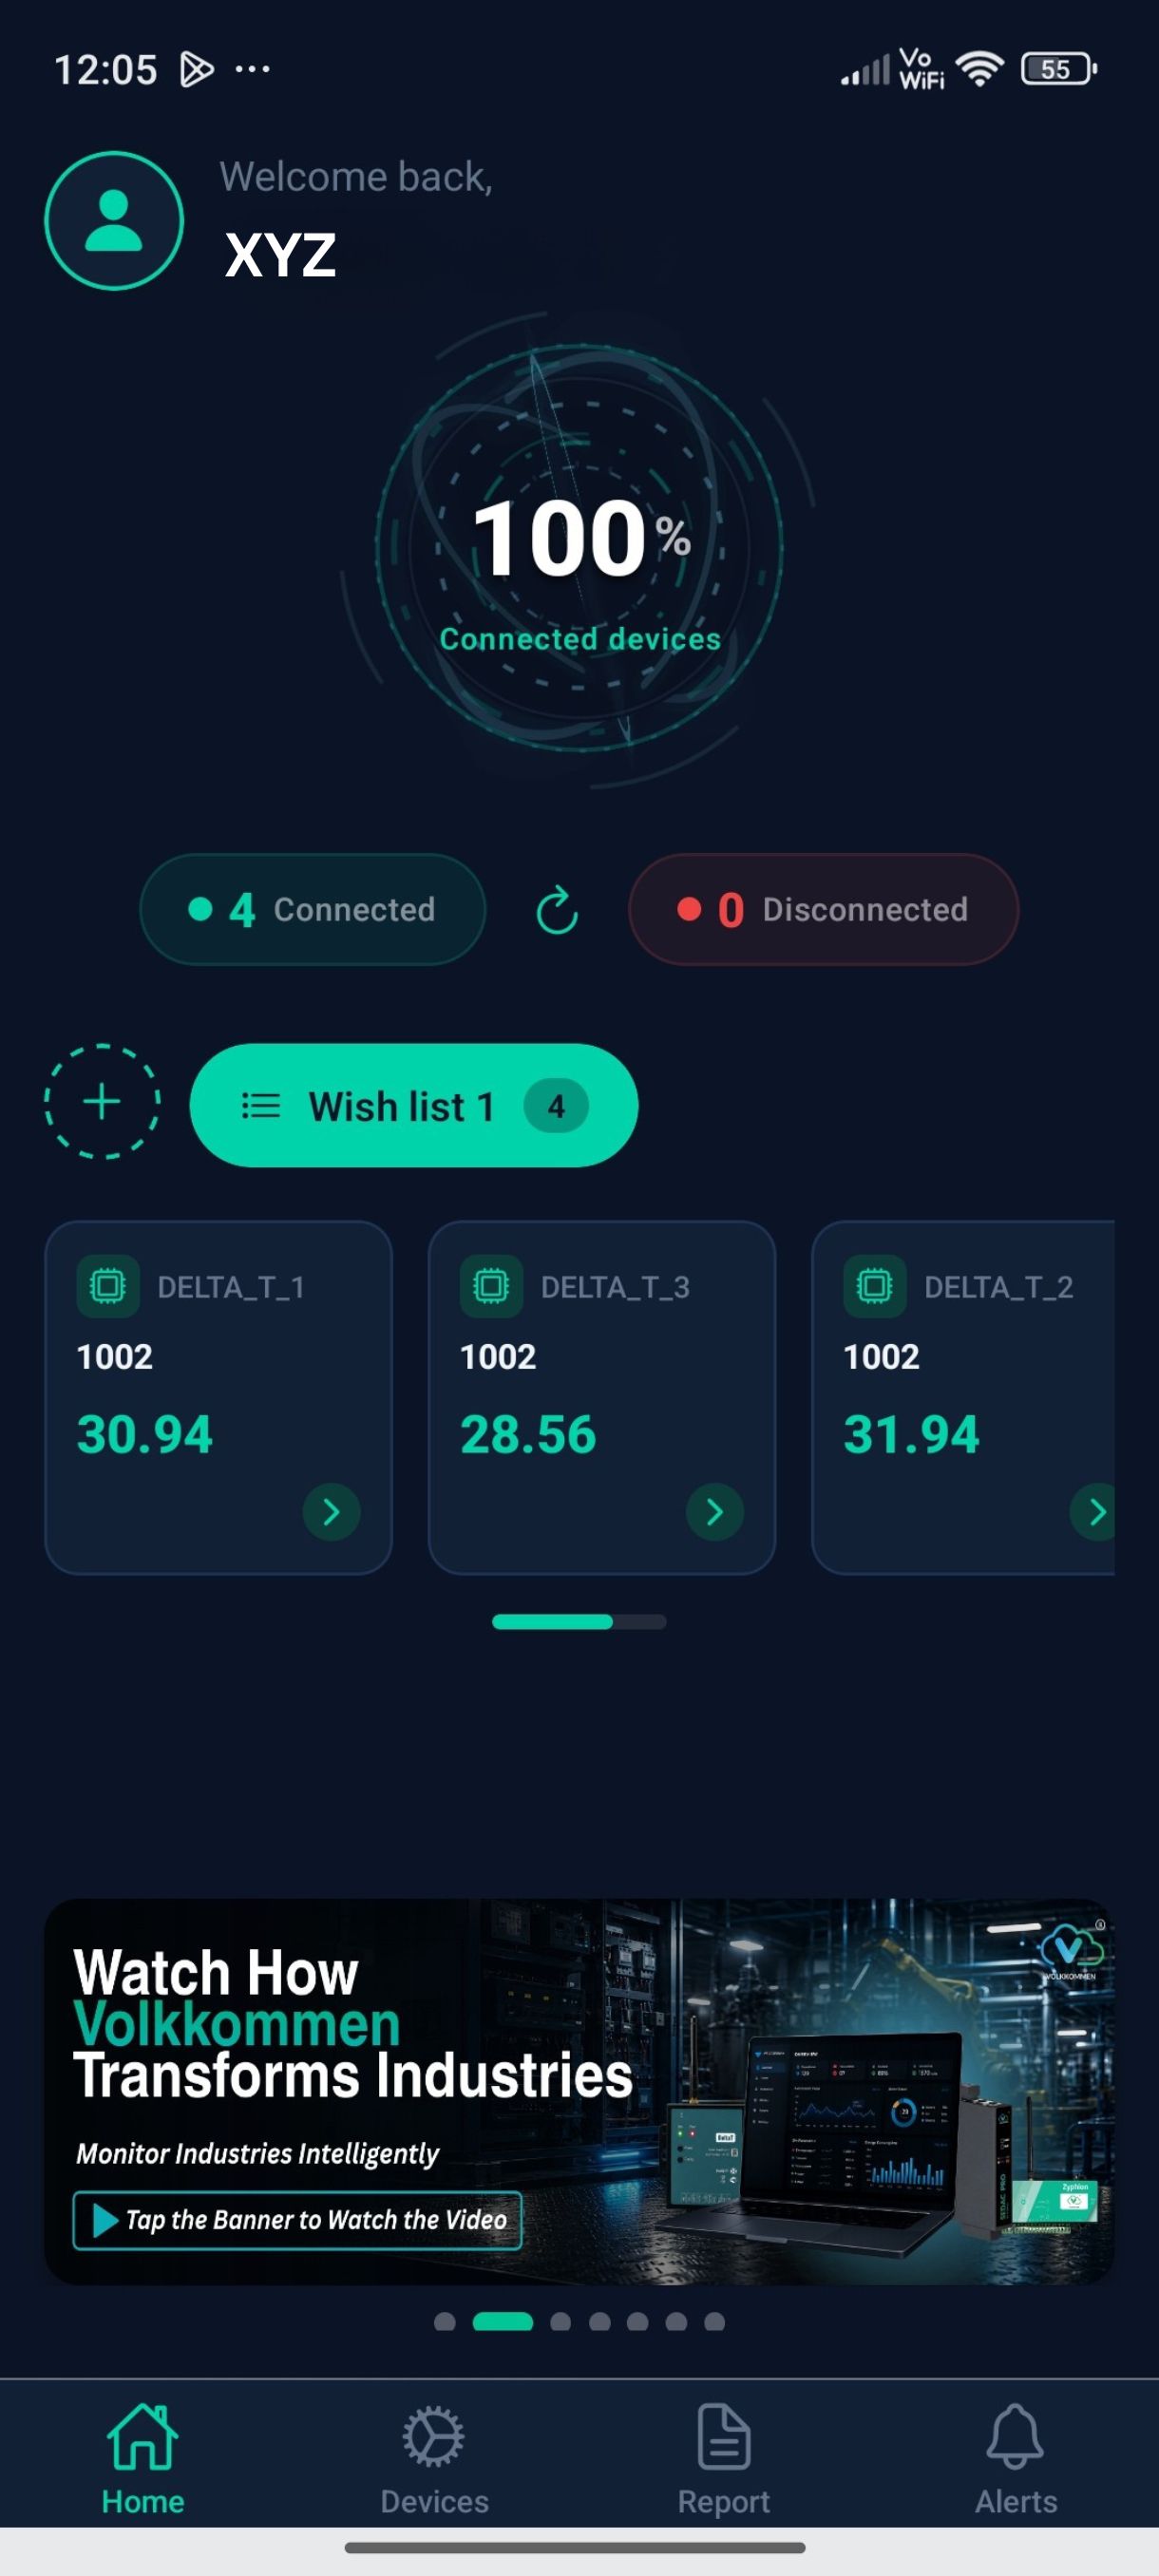
- Wishlist: Used to quickly view important bookmarked parameters. When a parameter is added to the Wishlist, its latest value is displayed directly on the Home page. This allows users to monitor frequently checked values without opening the full device list every time. Each Wishlist card shows the selected device name, parameter name, and latest value. By tapping the parameter card, users are redirected to the Parameter Details page. The Parameter Details page is the same page that can also be opened from the Devices section.
- The Home page display banners depending on Volkkommen Solutions we provide.
¶ Device Page
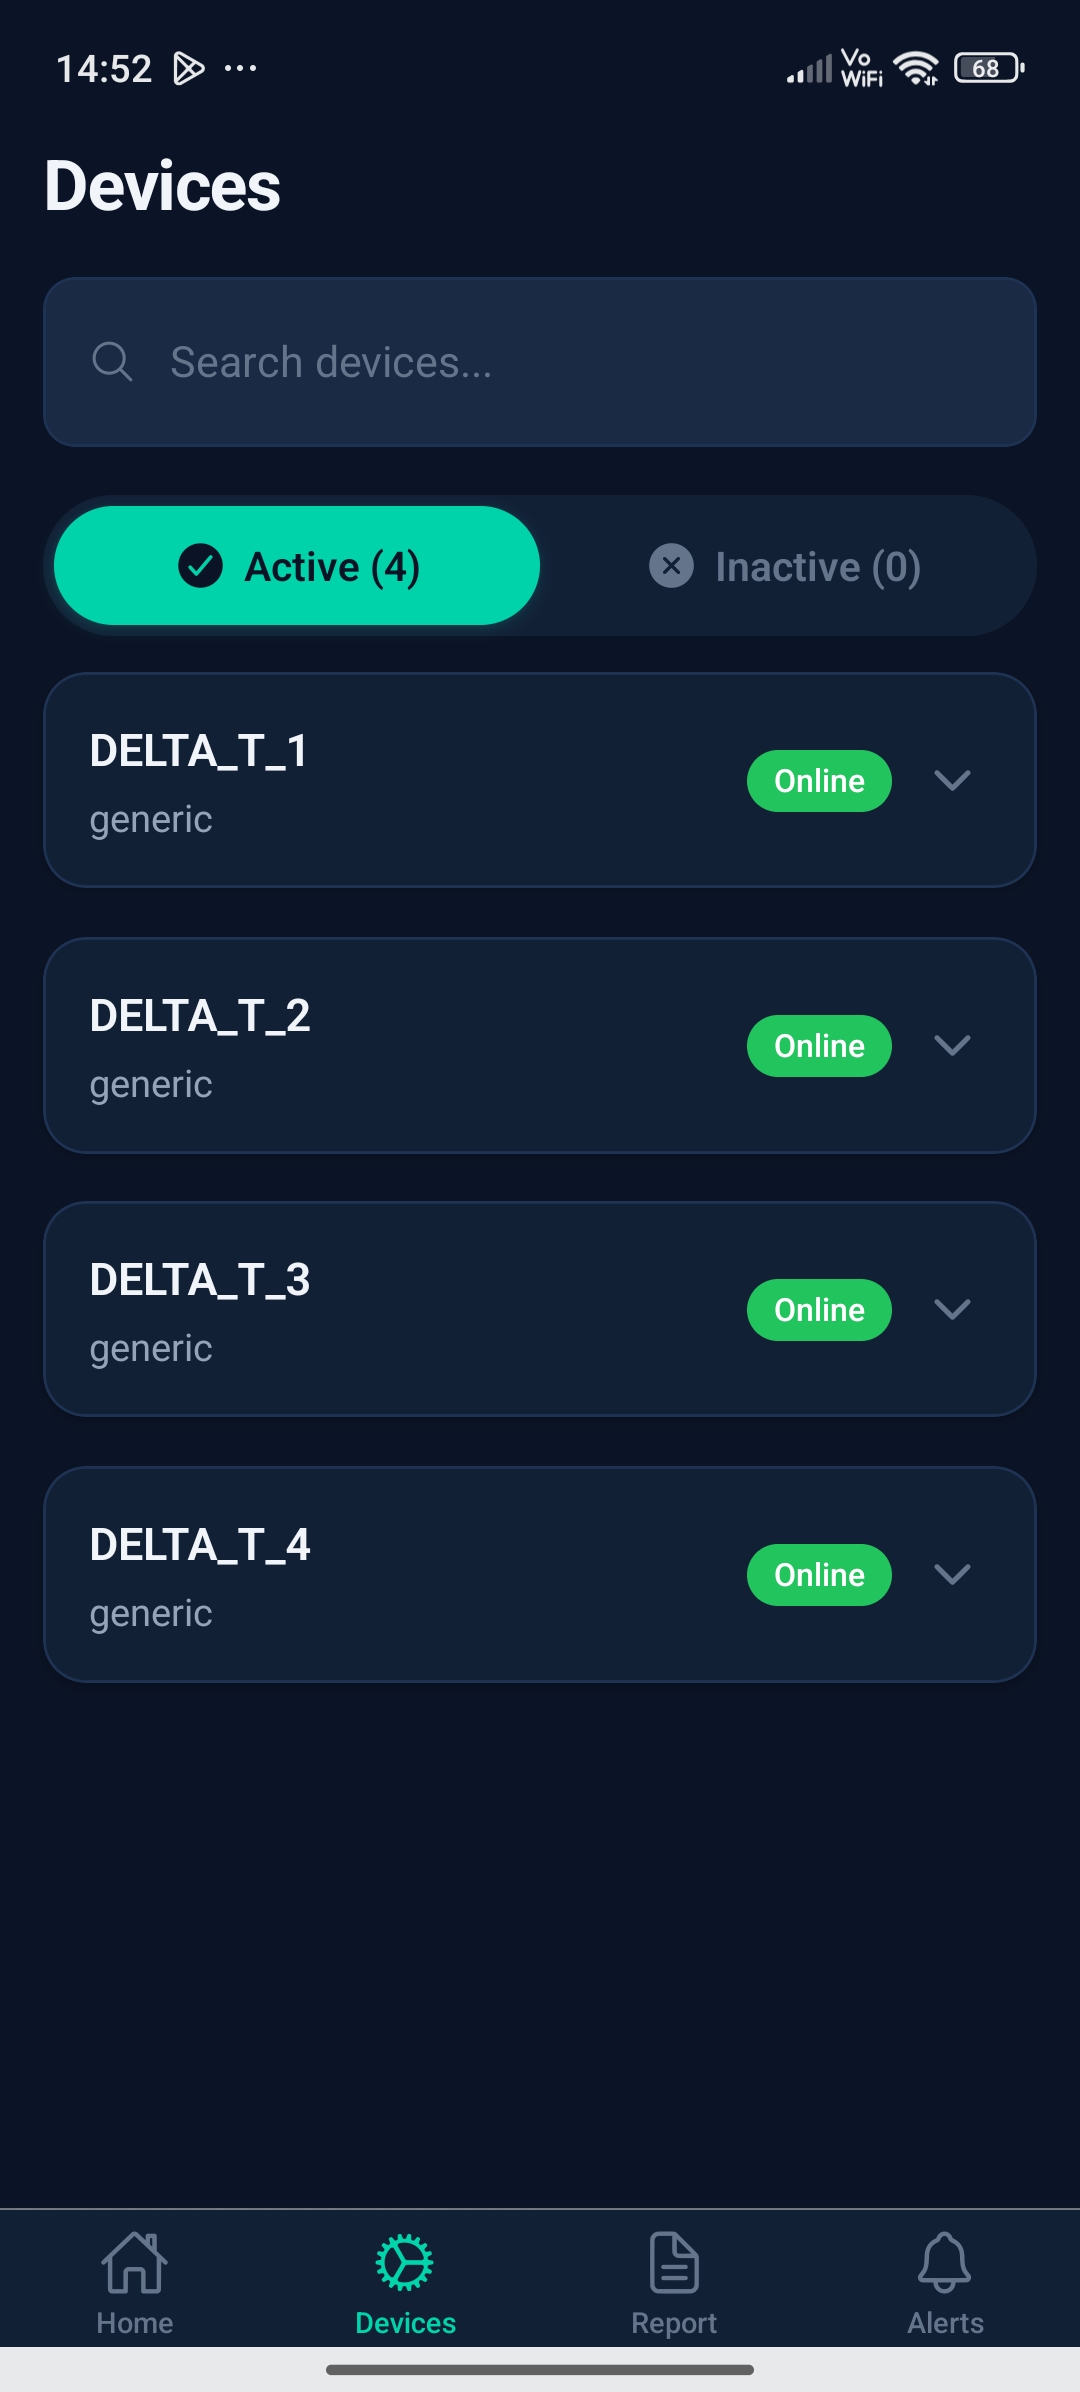
The Devices page displays the list of devices assigned to the logged-in user account. Users can search for a device using the search bar.
Devices can also be viewed based on their status:
- Active: Devices that are online and communicating.
- Inactive: Devices that are offline or not currently communicating.
Each device card shows the device name, device type/category, and online/offline status.
Tap a device from the list to open its detailed view.
¶ Device Details Page
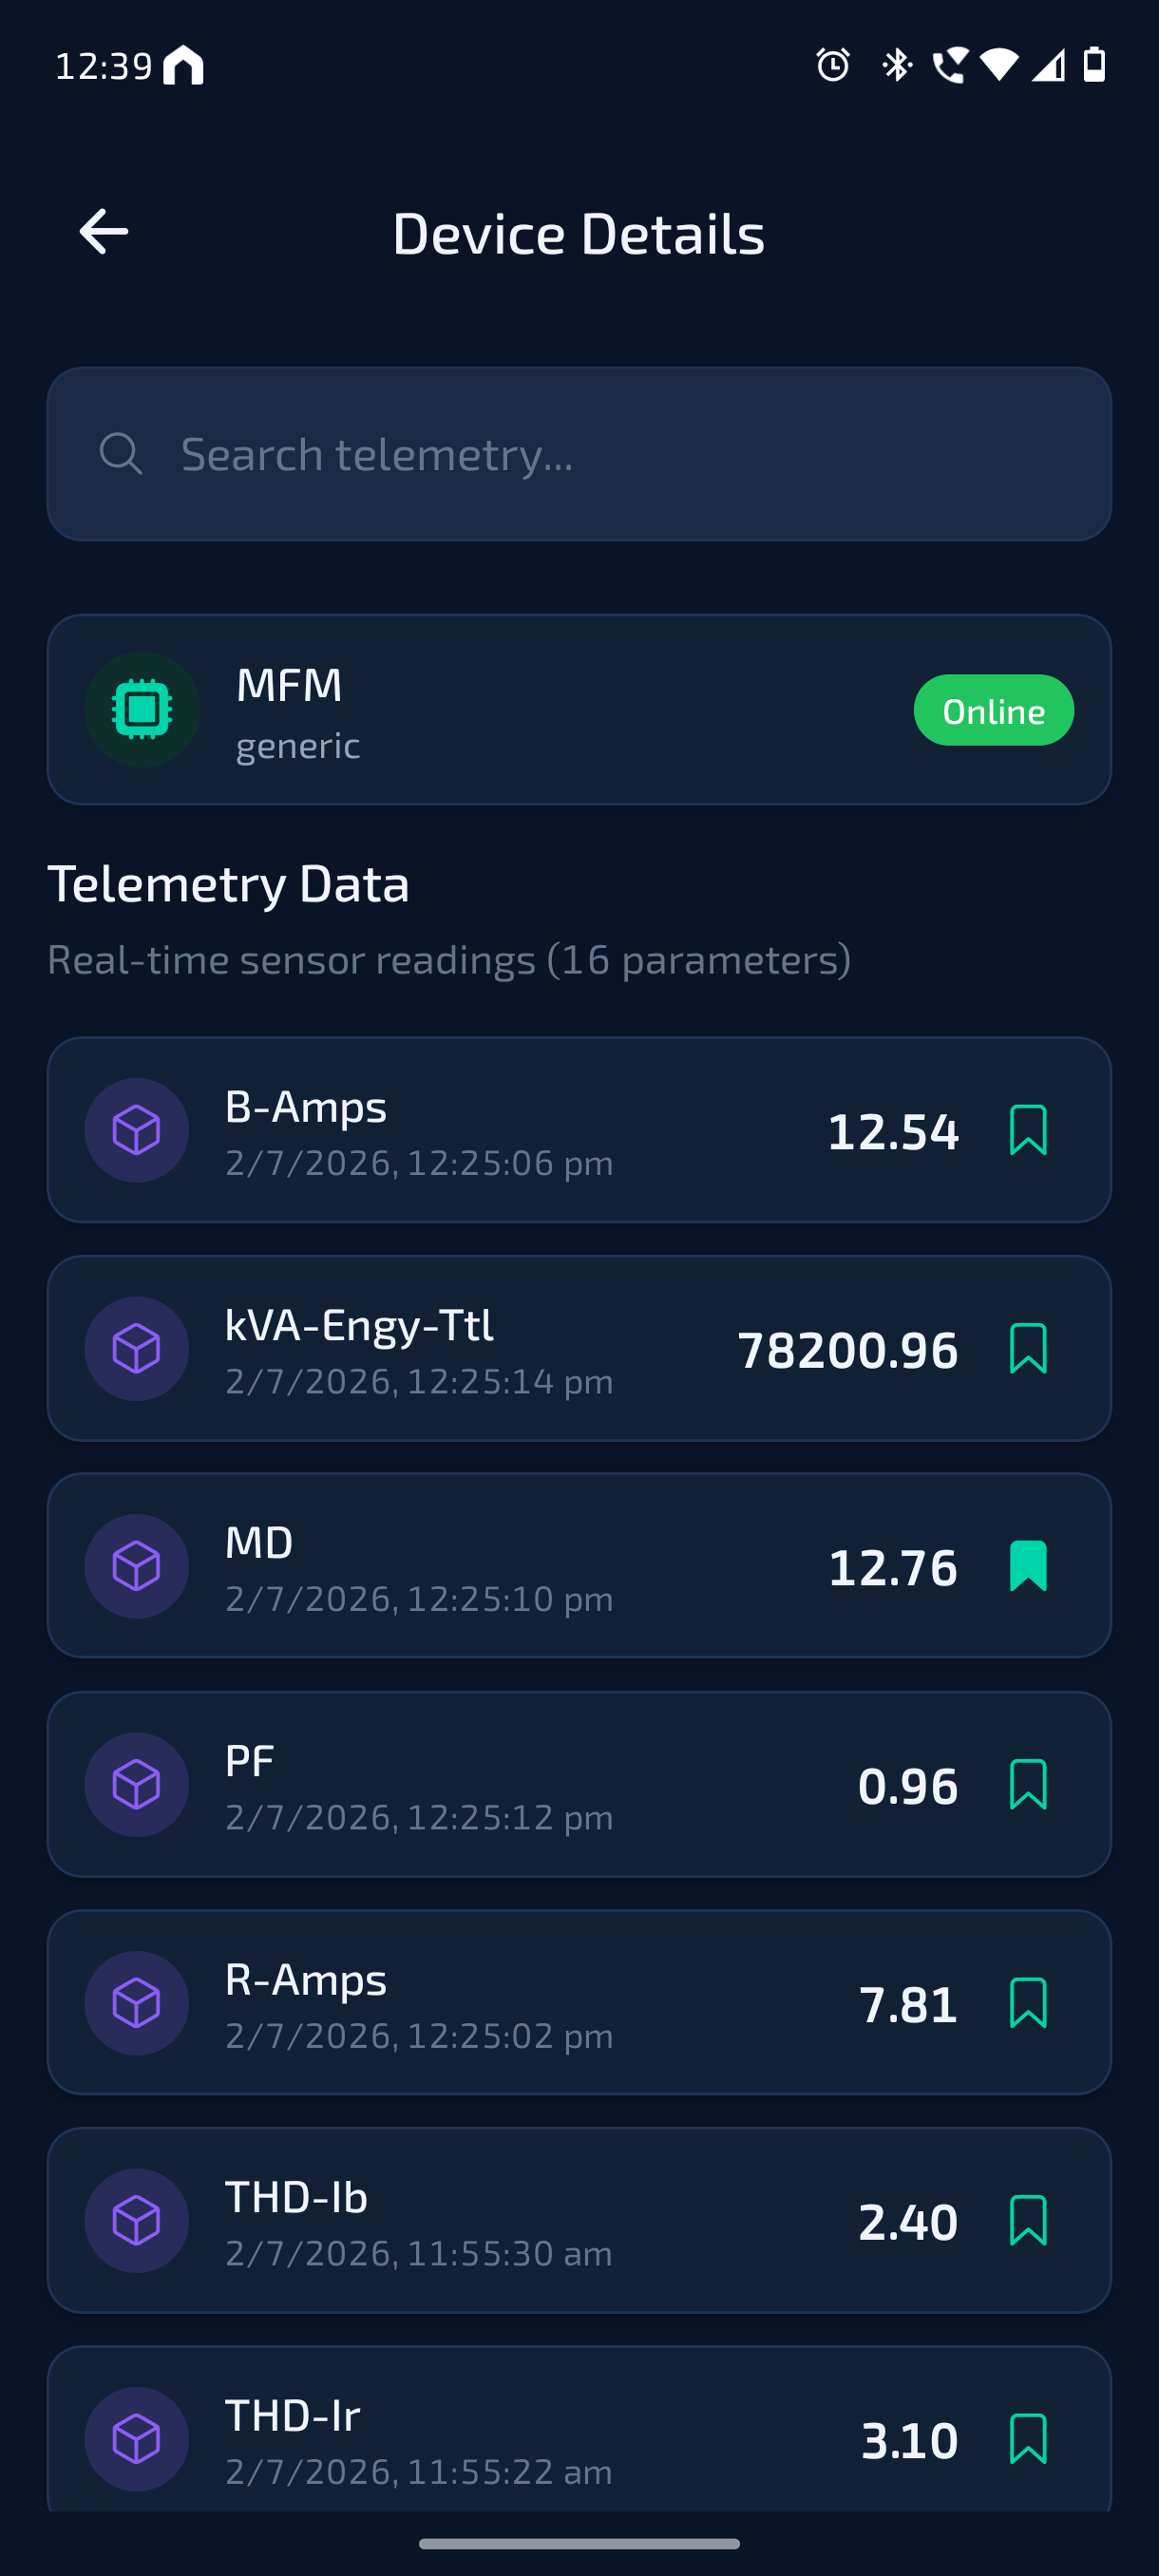
- The Device Details page shows the selected device information and its available telemetry data.
- Users can view the device name, device status, and the latest parameter readings received from the device.
- The search option can be used to quickly find a specific telemetry parameter when multiple parameters are available.
- Tap a parameter value to open the detailed parameter view.
¶ Parameter Details Page
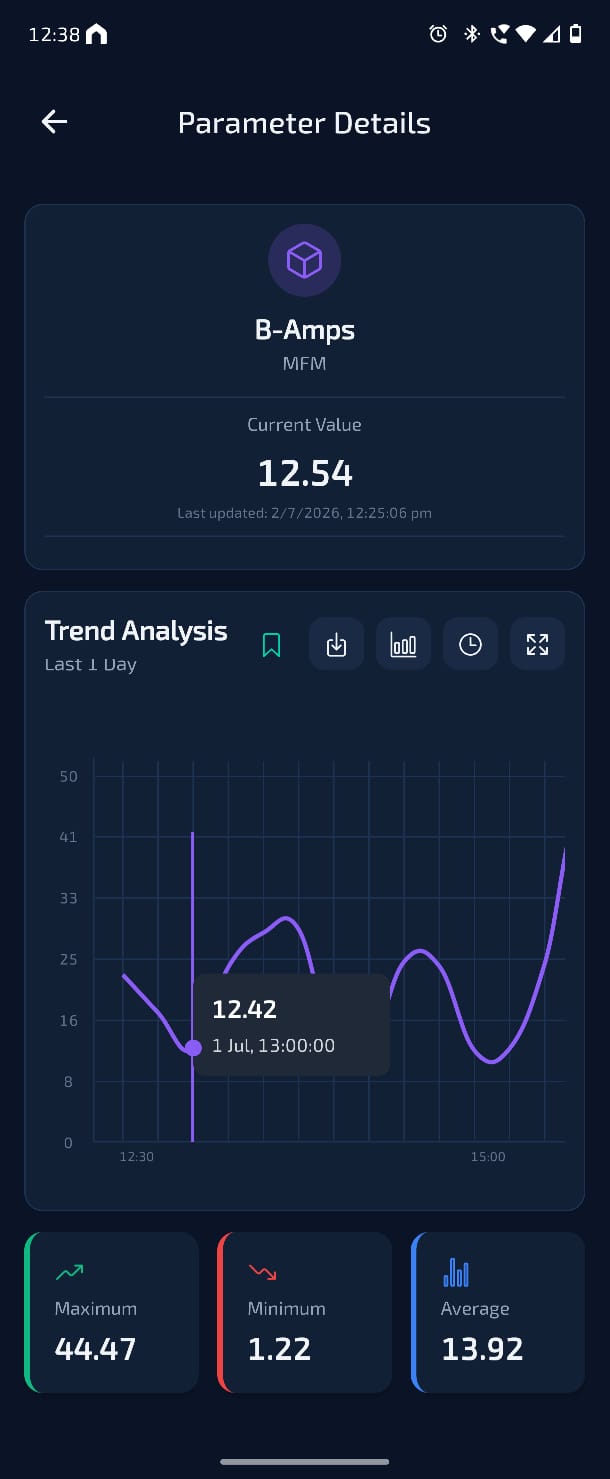
The Parameter Details page provides detailed information about a selected parameter.
Users can view:
- Parameter name
- Assigned device name
- Current value
- Last updated time
- Trend analysis: The trend graph shows the historical variation of the selected parameter over time. When the user touches the graph, the app displays the exact timestamp and parameter value for that point. This helps users understand whether the parameter is stable, increasing, decreasing, or showing abnormal variation. Users can view the trend graph, check historical data, and analyze changes within the selected time range. The available options may include graph view, time range selection, download/export option, bookmark option, or expanded view, depending on the app configuration.
- Maximum value, Minimum value, Average value
¶ Report Page
The Data Report section allows users to export historical data from the devices and parameters assigned to their account.
Reports can be generated by selecting the required device, parameter, date range, aggregation type, and interval.
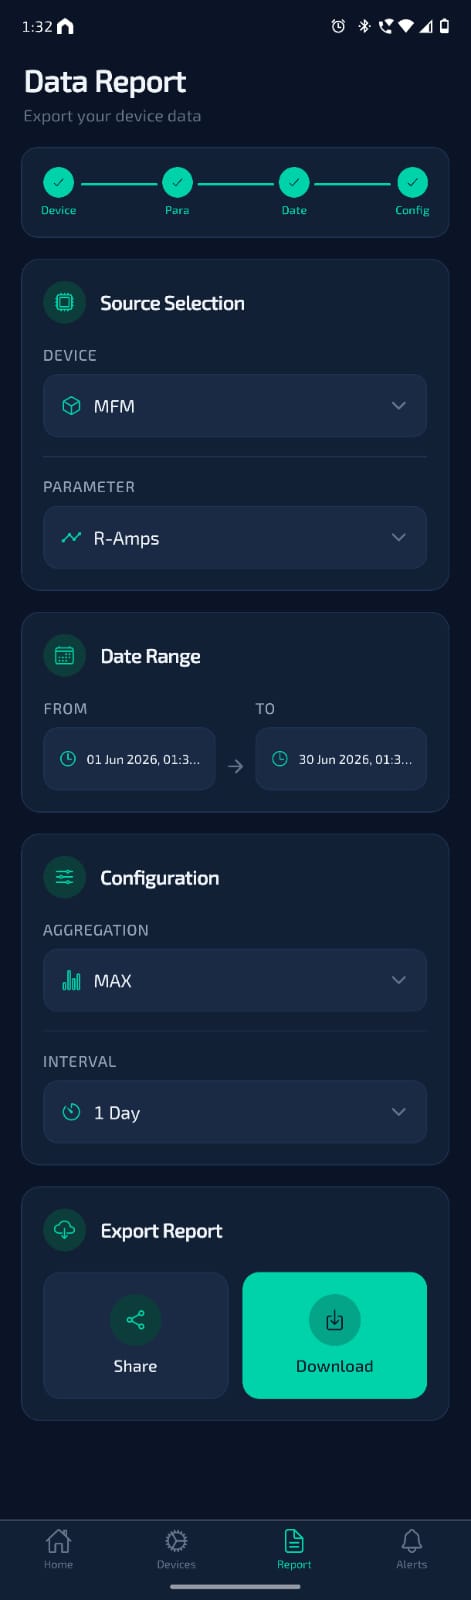
To generate a report, follow the steps below:
- Select Device
Choose the required device from the device dropdown list. - Select Parameter
After selecting the device, choose the required parameter from the available parameter list. - Choose Date Range
Select the From and To date/time for the report. - Select Configuration
Choose the required aggregation type and interval. Aggregation options may include maximum, minimum, average. - Export Report
After completing the required selections, the report can be exported using the available options:
Share – Share the generated report through supported mobile sharing options.
Download – Download the report directly to the mobile device.
Purpose of Reports: Reports help users review historical data, compare parameter changes, analyze performance, and maintain records for monitoring, maintenance, or operational review.
¶ Threshold-Based Report Highlighting
If threshold limits are configured for a parameter, abnormal values can be highlighted in the downloaded report. Values that cross the configured limit will be shown with color changes based on severity. This helps users quickly identify when and where abnormal conditions occurred without manually checking the entire report.
¶ Alerts Page
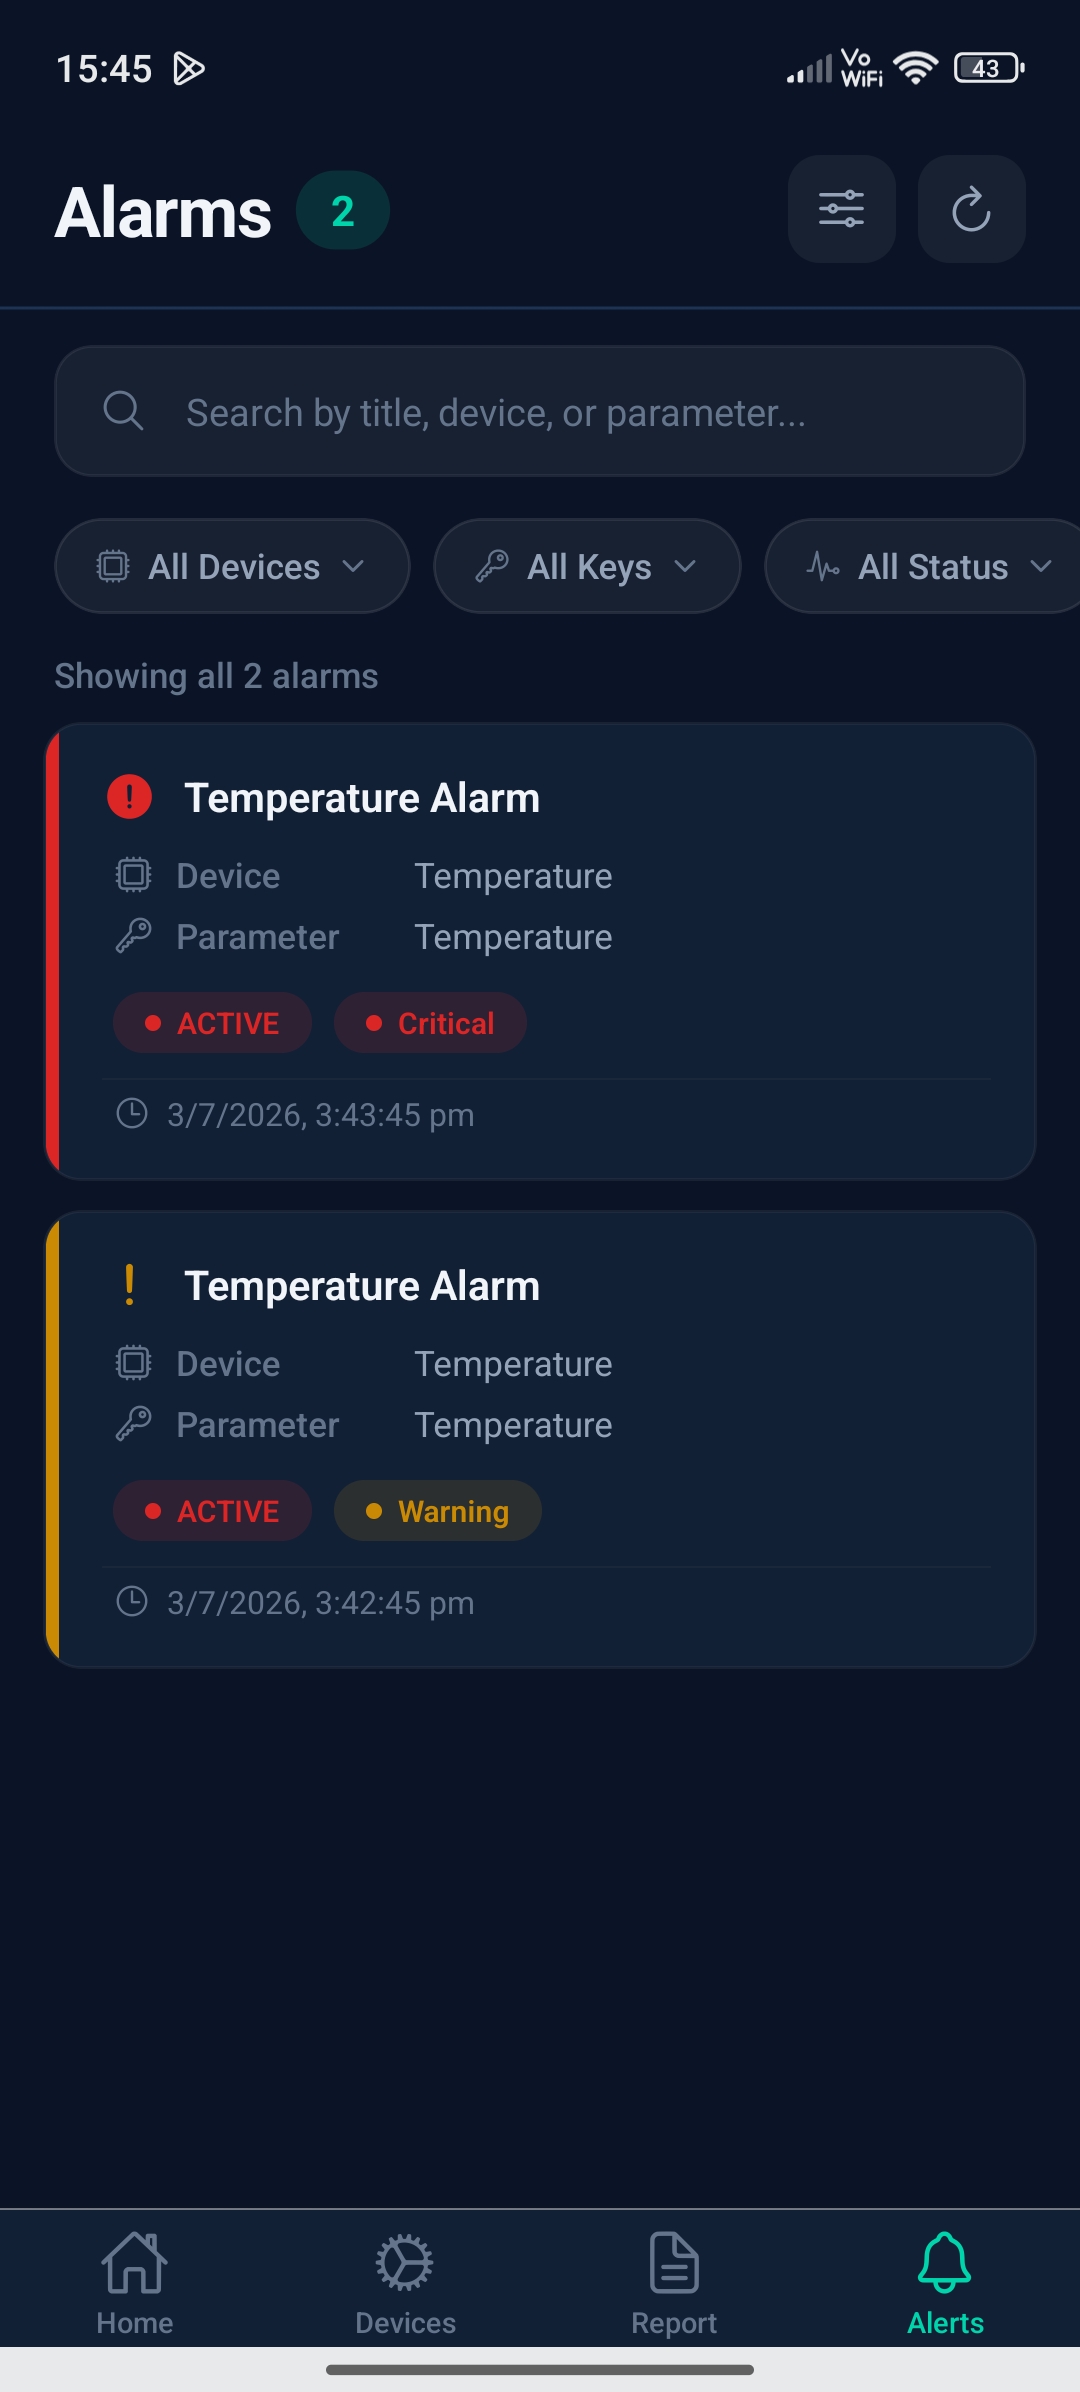
The Alerts page displays alarms generated from assigned devices and parameters in the web.
Users can search alarms by title, device, or parameter. Alarms can also be filtered by:
- Device
- Key/parameter
- Status
If no alarms are available, the page will show No alarms found. This means there are currently no active or matching alarms based on the selected filters.
¶ Side Panel / Menu
The Side Panel provides quick access to important app options. Users can open the Side Panel from the Home page by tapping the profile/menu icon. The panel shows the logged-in account name and registered email address.
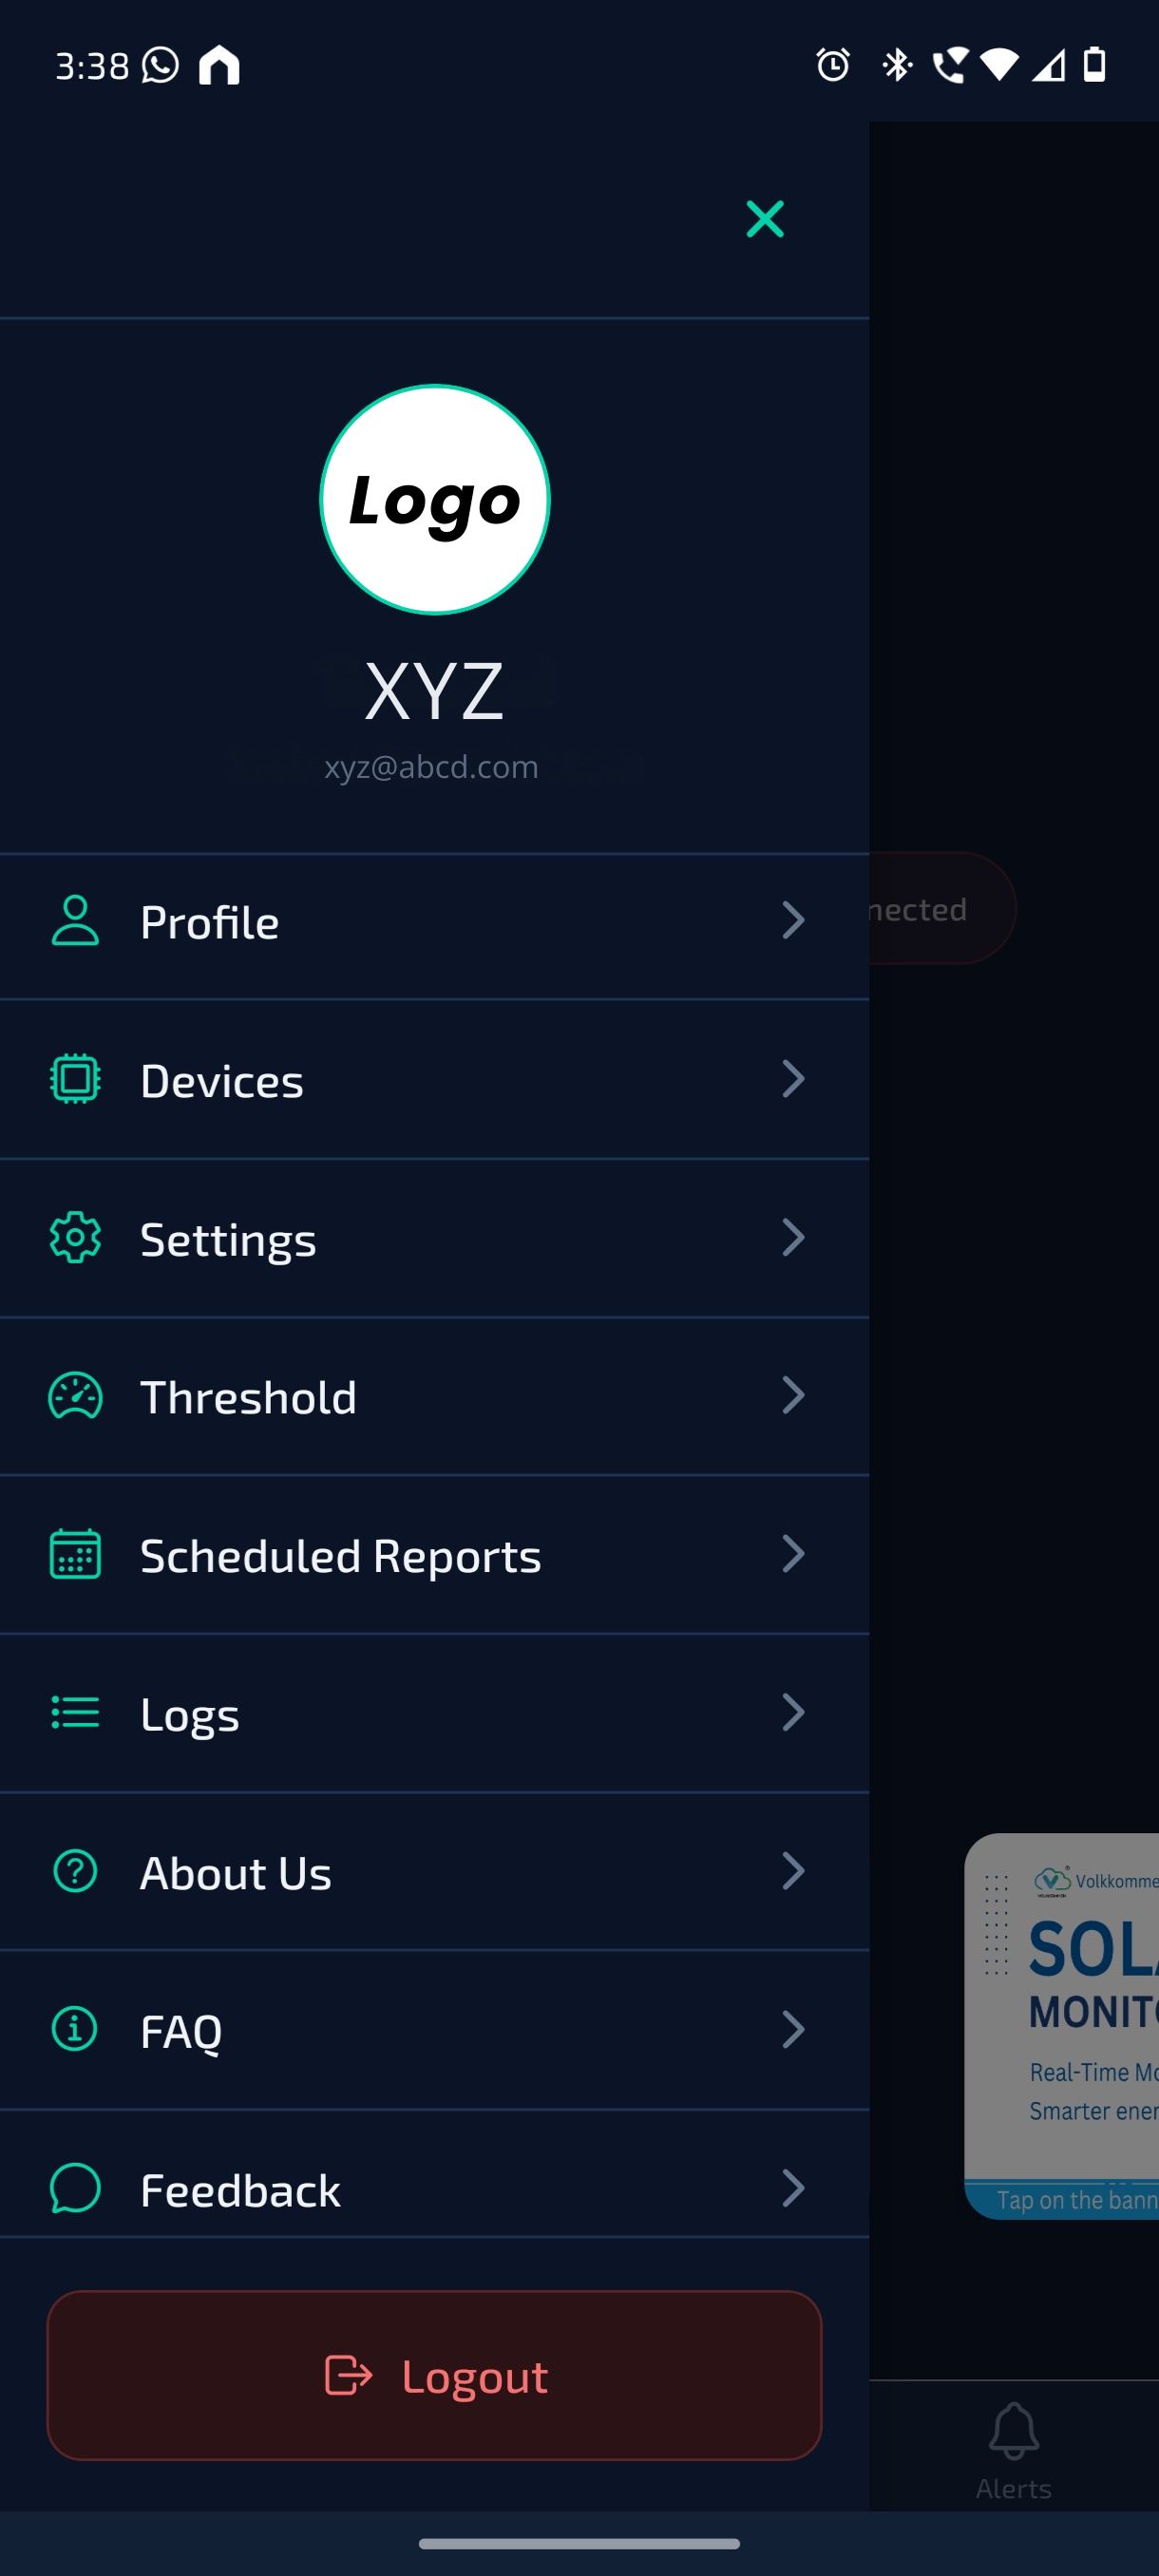
From this menu, users can access:
- Profile – View account details.
- Devices – Open the assigned device list.
- Settings – View available app or account settings.
- Threshold – View or manage configured threshold limits in the Report.
- Scheduled Reports – View or manage scheduled report options, if enabled in the .
- Logs – View available activity or event records.
- About Us – View information about V-VAC and Volkkommen.
- FAQ – Check answers to common questions.
- Feedback – Share comments, issues, or suggestions with the V-VAC team.
- Logout – Sign out from the current account.
¶ Profile
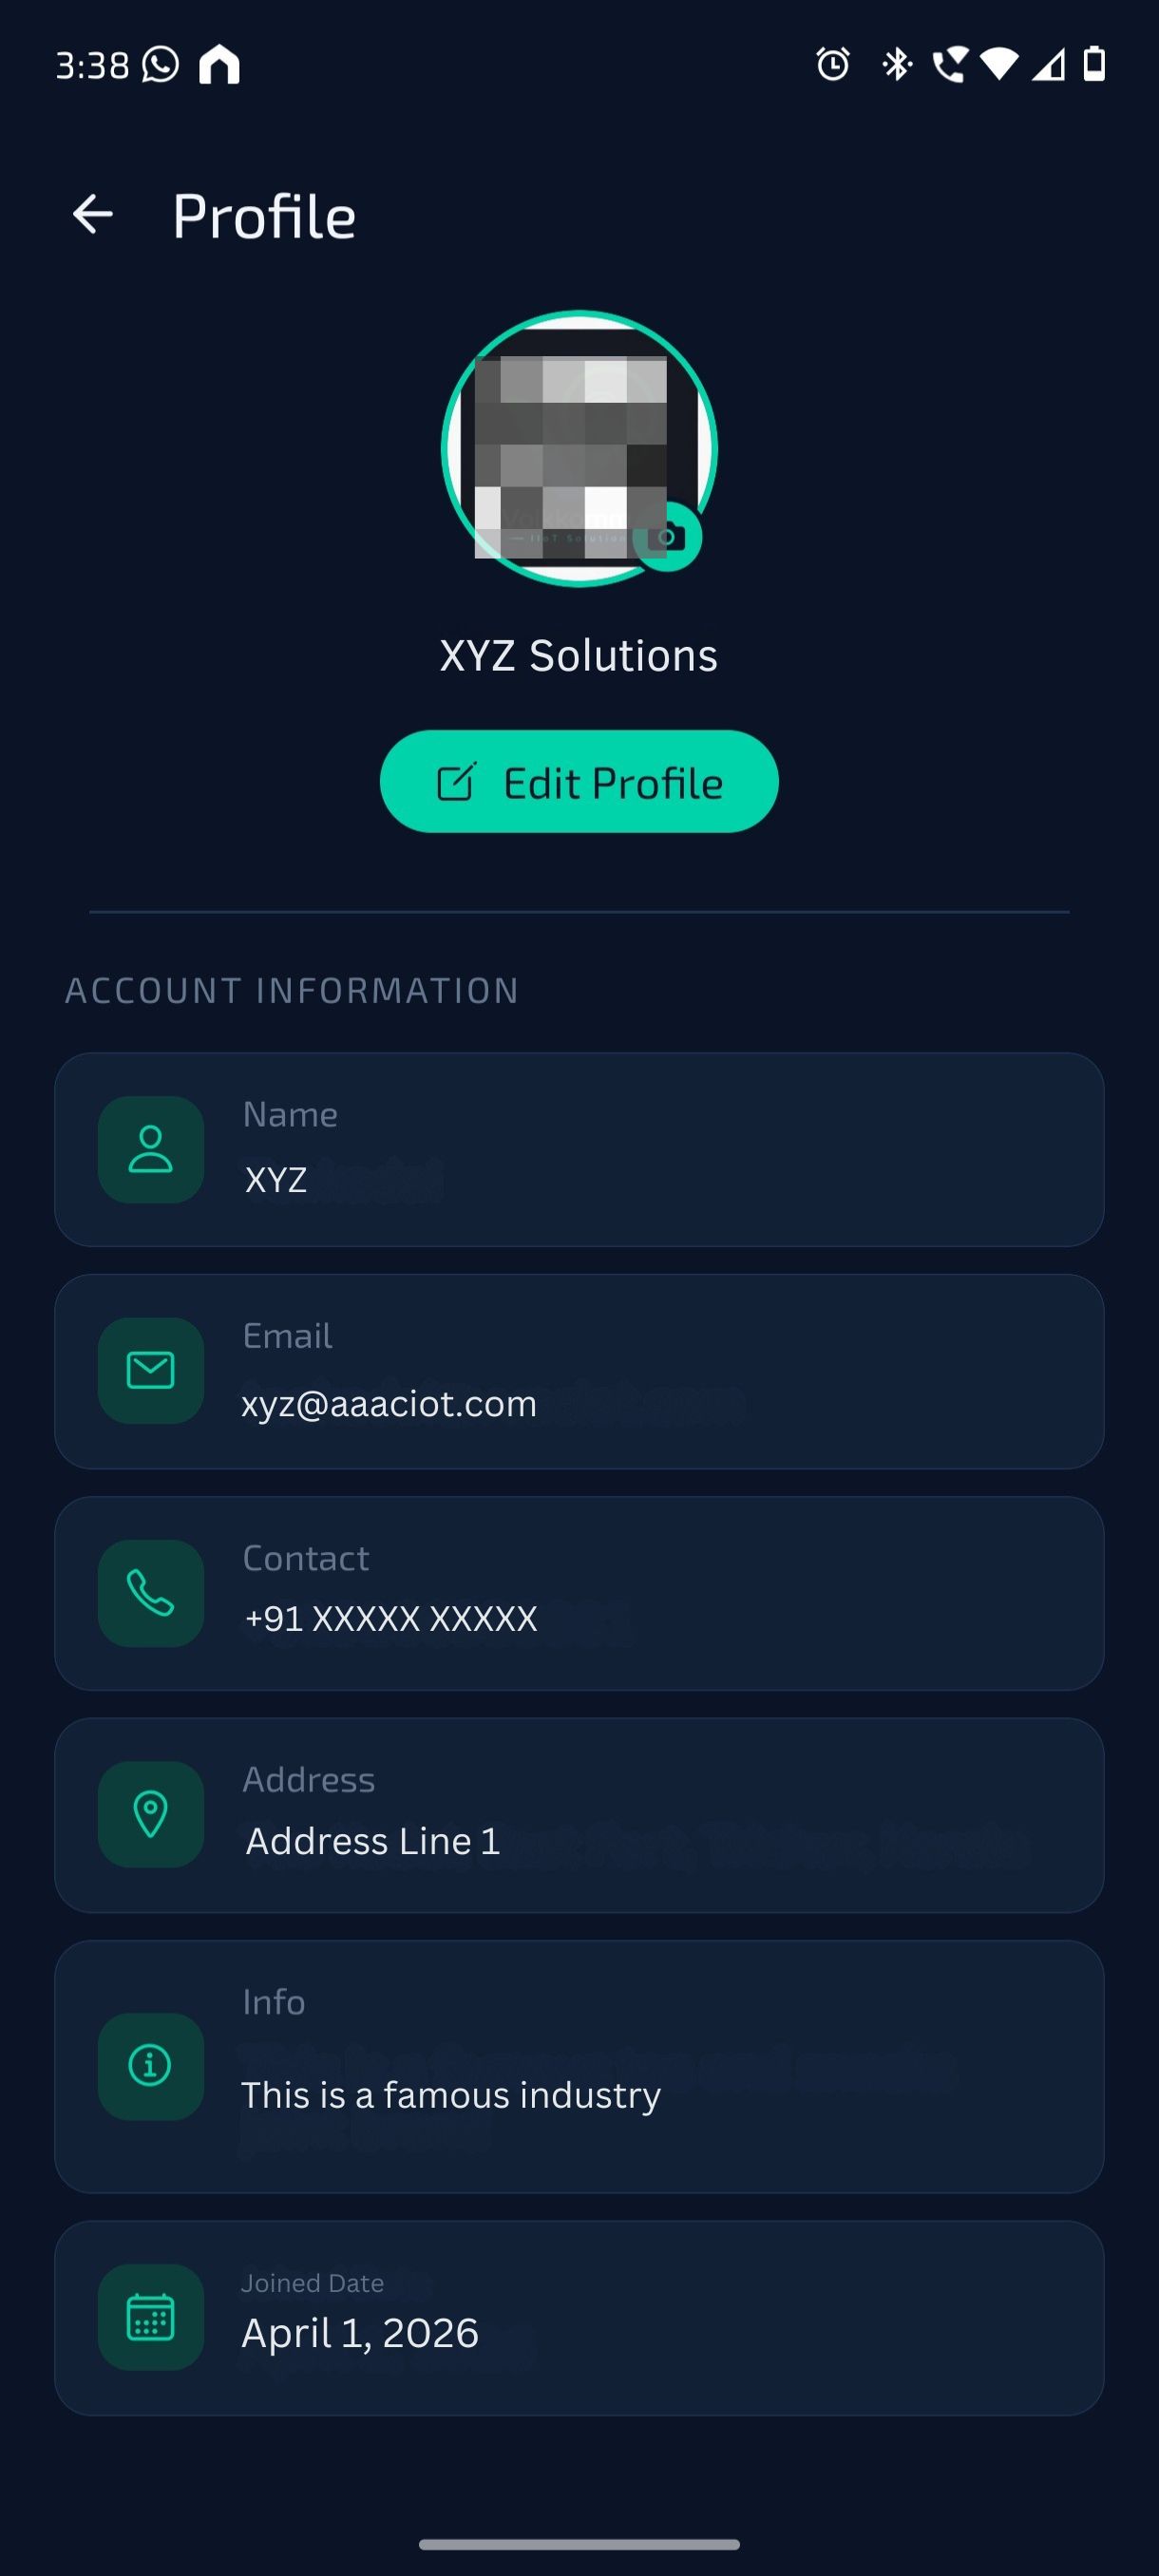
The Profile page displays the account information of the logged-in user.
Users can view details such as:
- Profile image
- Name
- Email address
- Contact number
- Address
- Account information
- Joined date
The Edit Profile option can be used to update editable profile details, based on the access provided.
¶ Devices
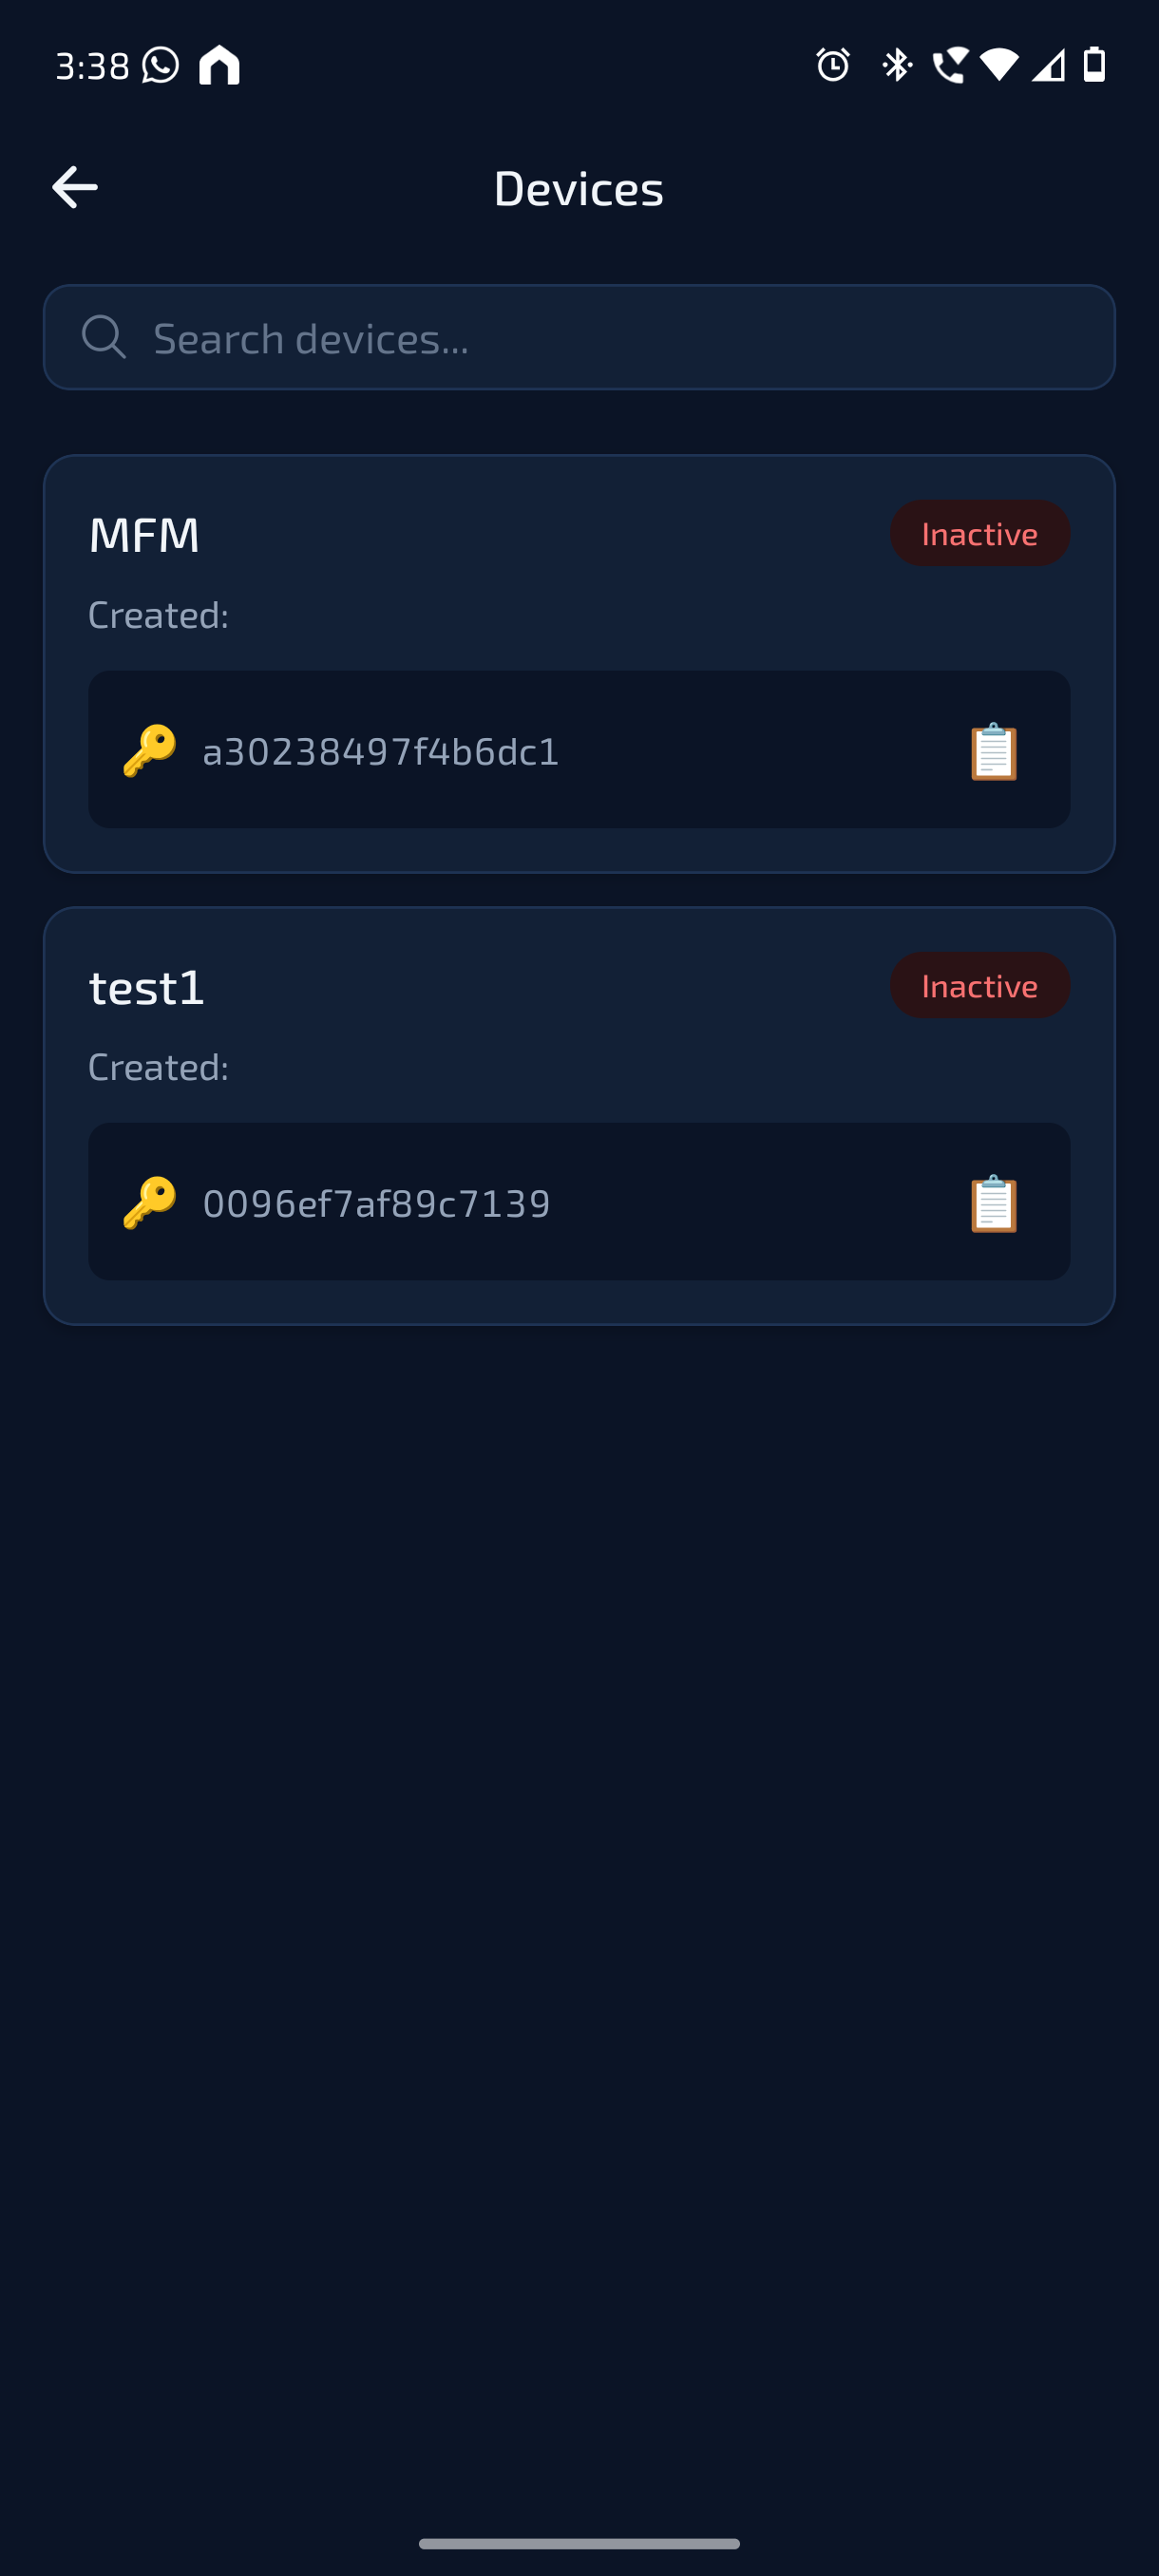
The Devices page from the Side Panel displays the devices assigned to the user account.
Users can search for a device using the search bar. Each device card shows the device name, current status, and device key or identification details.
The status label indicates whether the device is active or inactive.
Active means the device is currently communicating with the platform.
Inactive means the device is not currently communicating with the platform.
The copy icon can be used to copy the device key or device identification details, if required.
¶ Settings
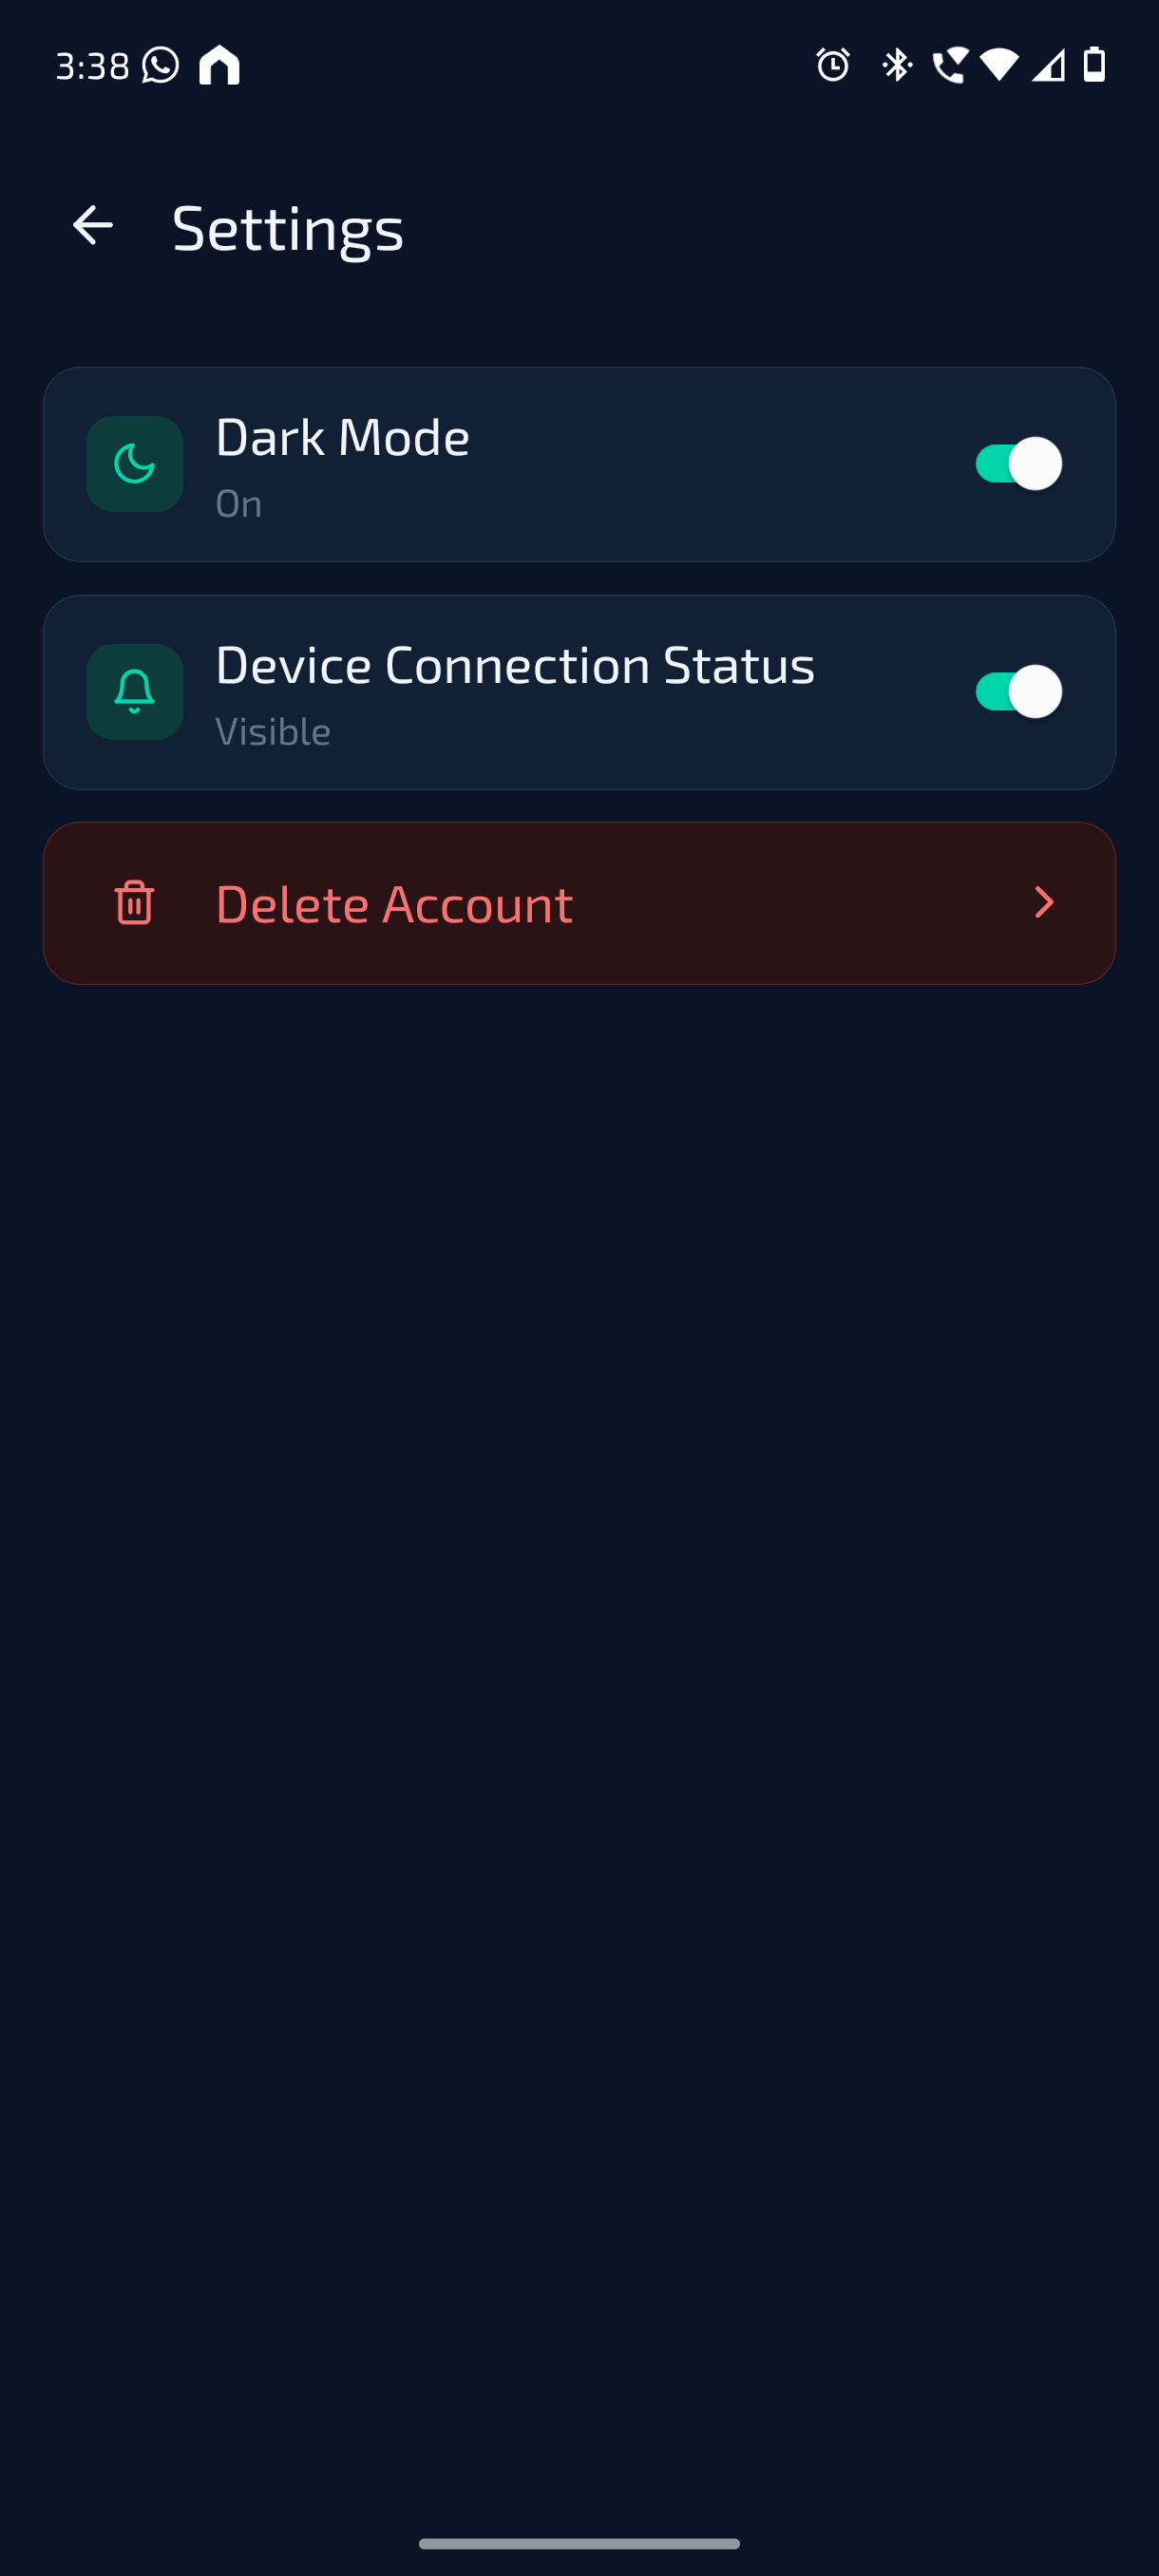
The Settings page allows users to manage available app preferences.
Available options include:
- Dark Mode
Allows users to enable or disable the dark theme of the app. - Device Connection Status
Allows users to show or hide the device connection status in the app. - Delete Account
Starts the account deletion request process.
Note: Deleting an account is a permanent and sensitive action. The deletion request will be reviewed and processed by the V-VAC team only after confirmation.
¶ Threshold Configuration
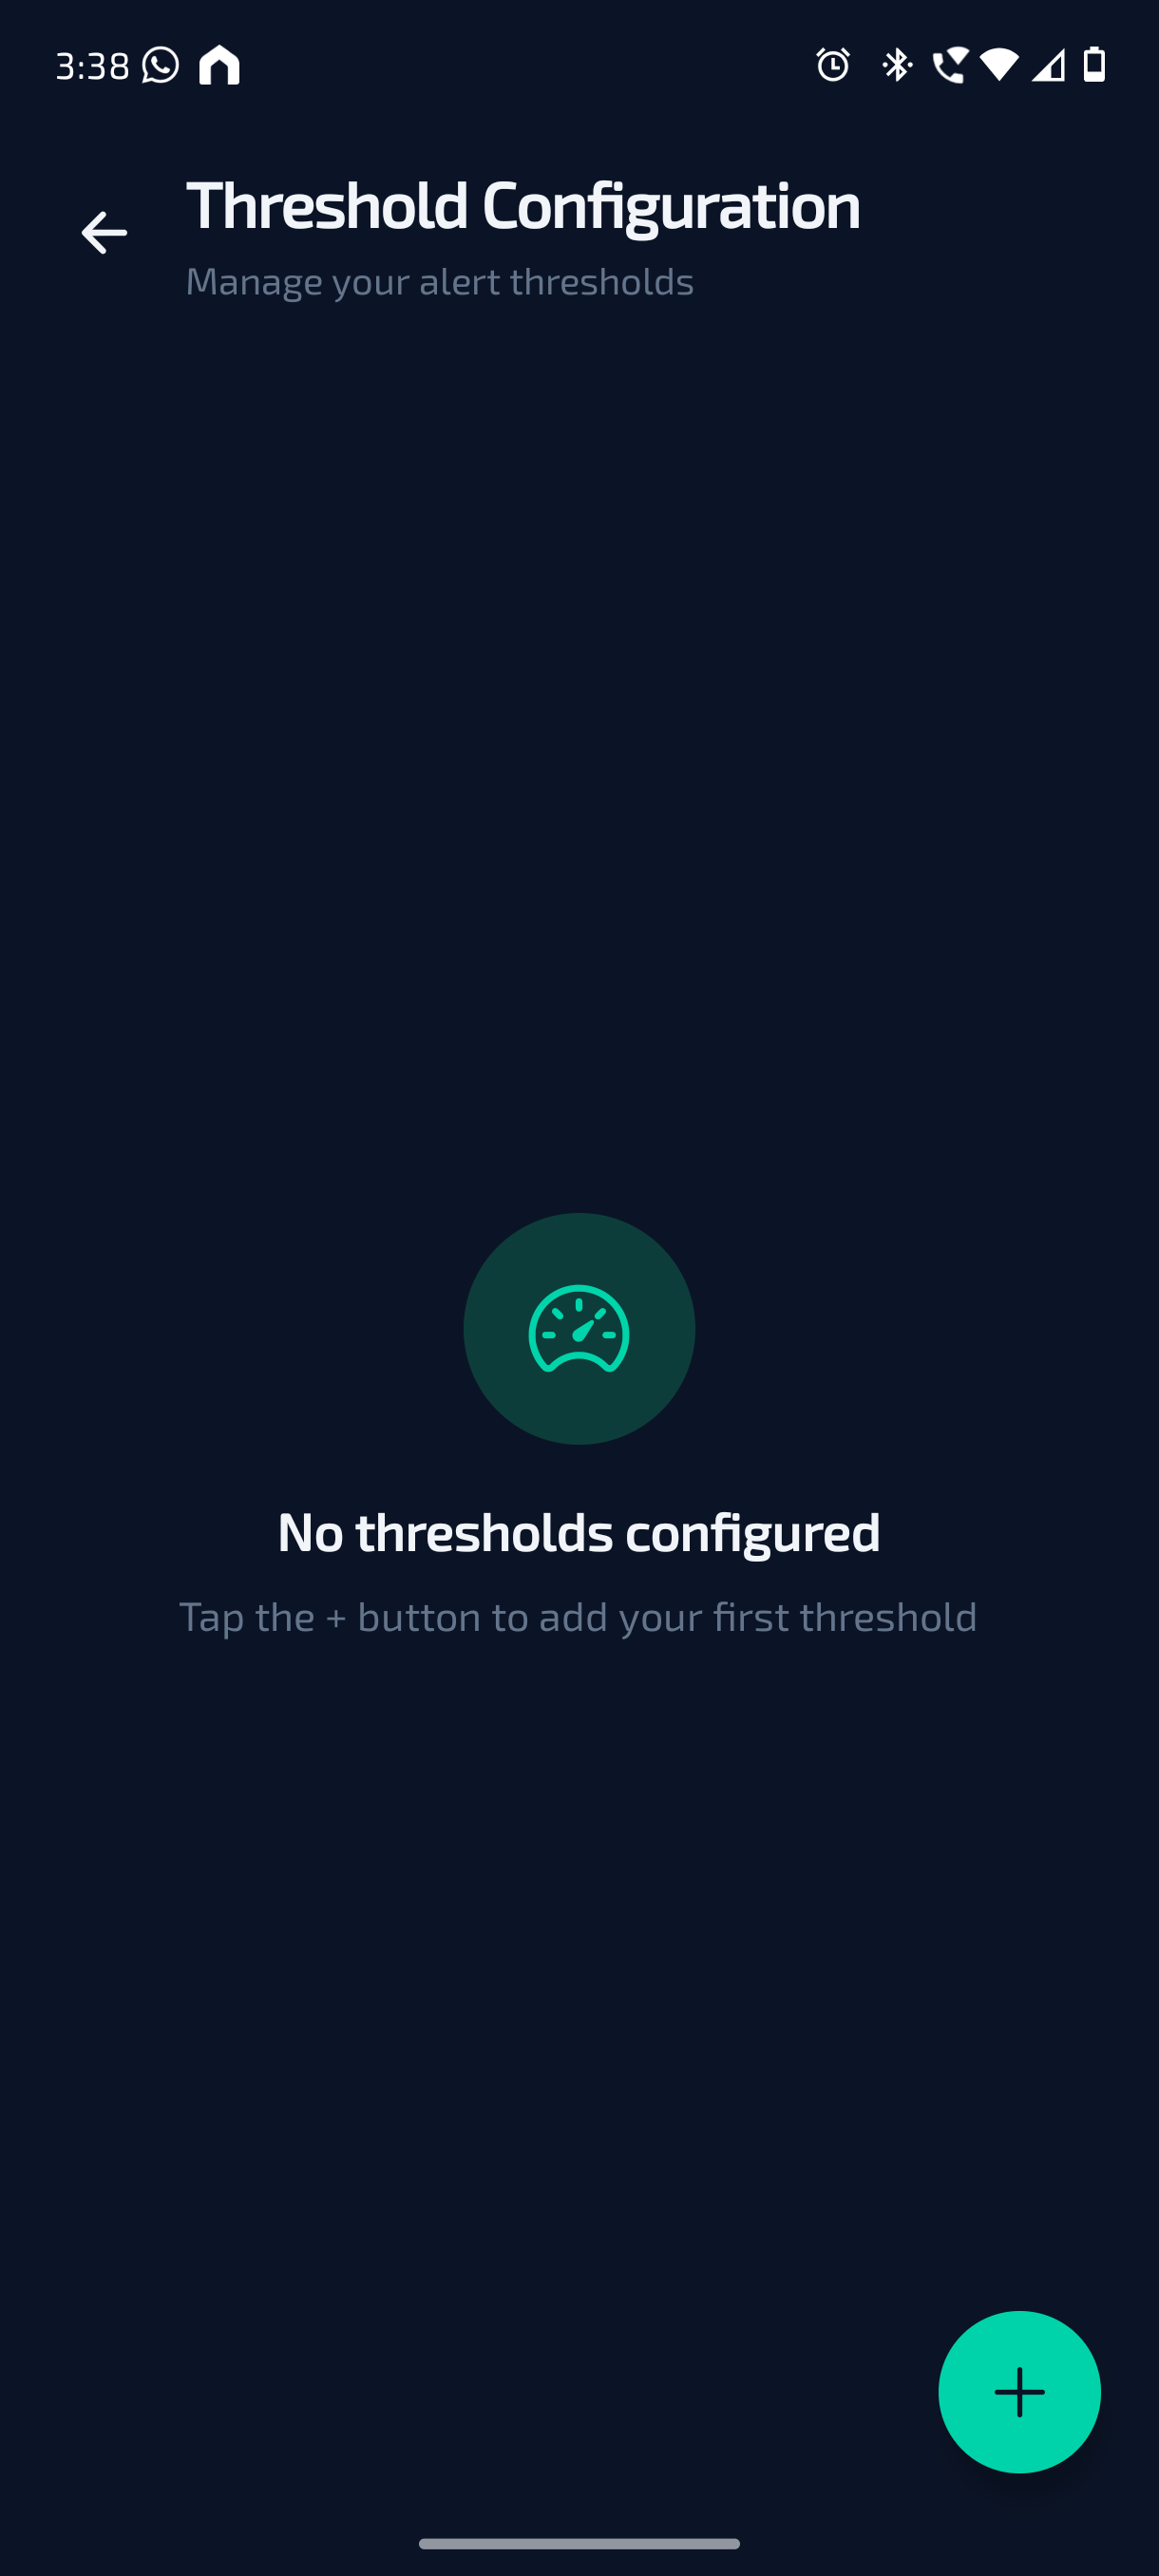
The Threshold Configuration page is used to set limit values for selected device parameters. These limits are used to highlight values in the downloaded reports based on severity. Thresholds help users quickly identify abnormal or important value changes in report data without manually checking every reading.
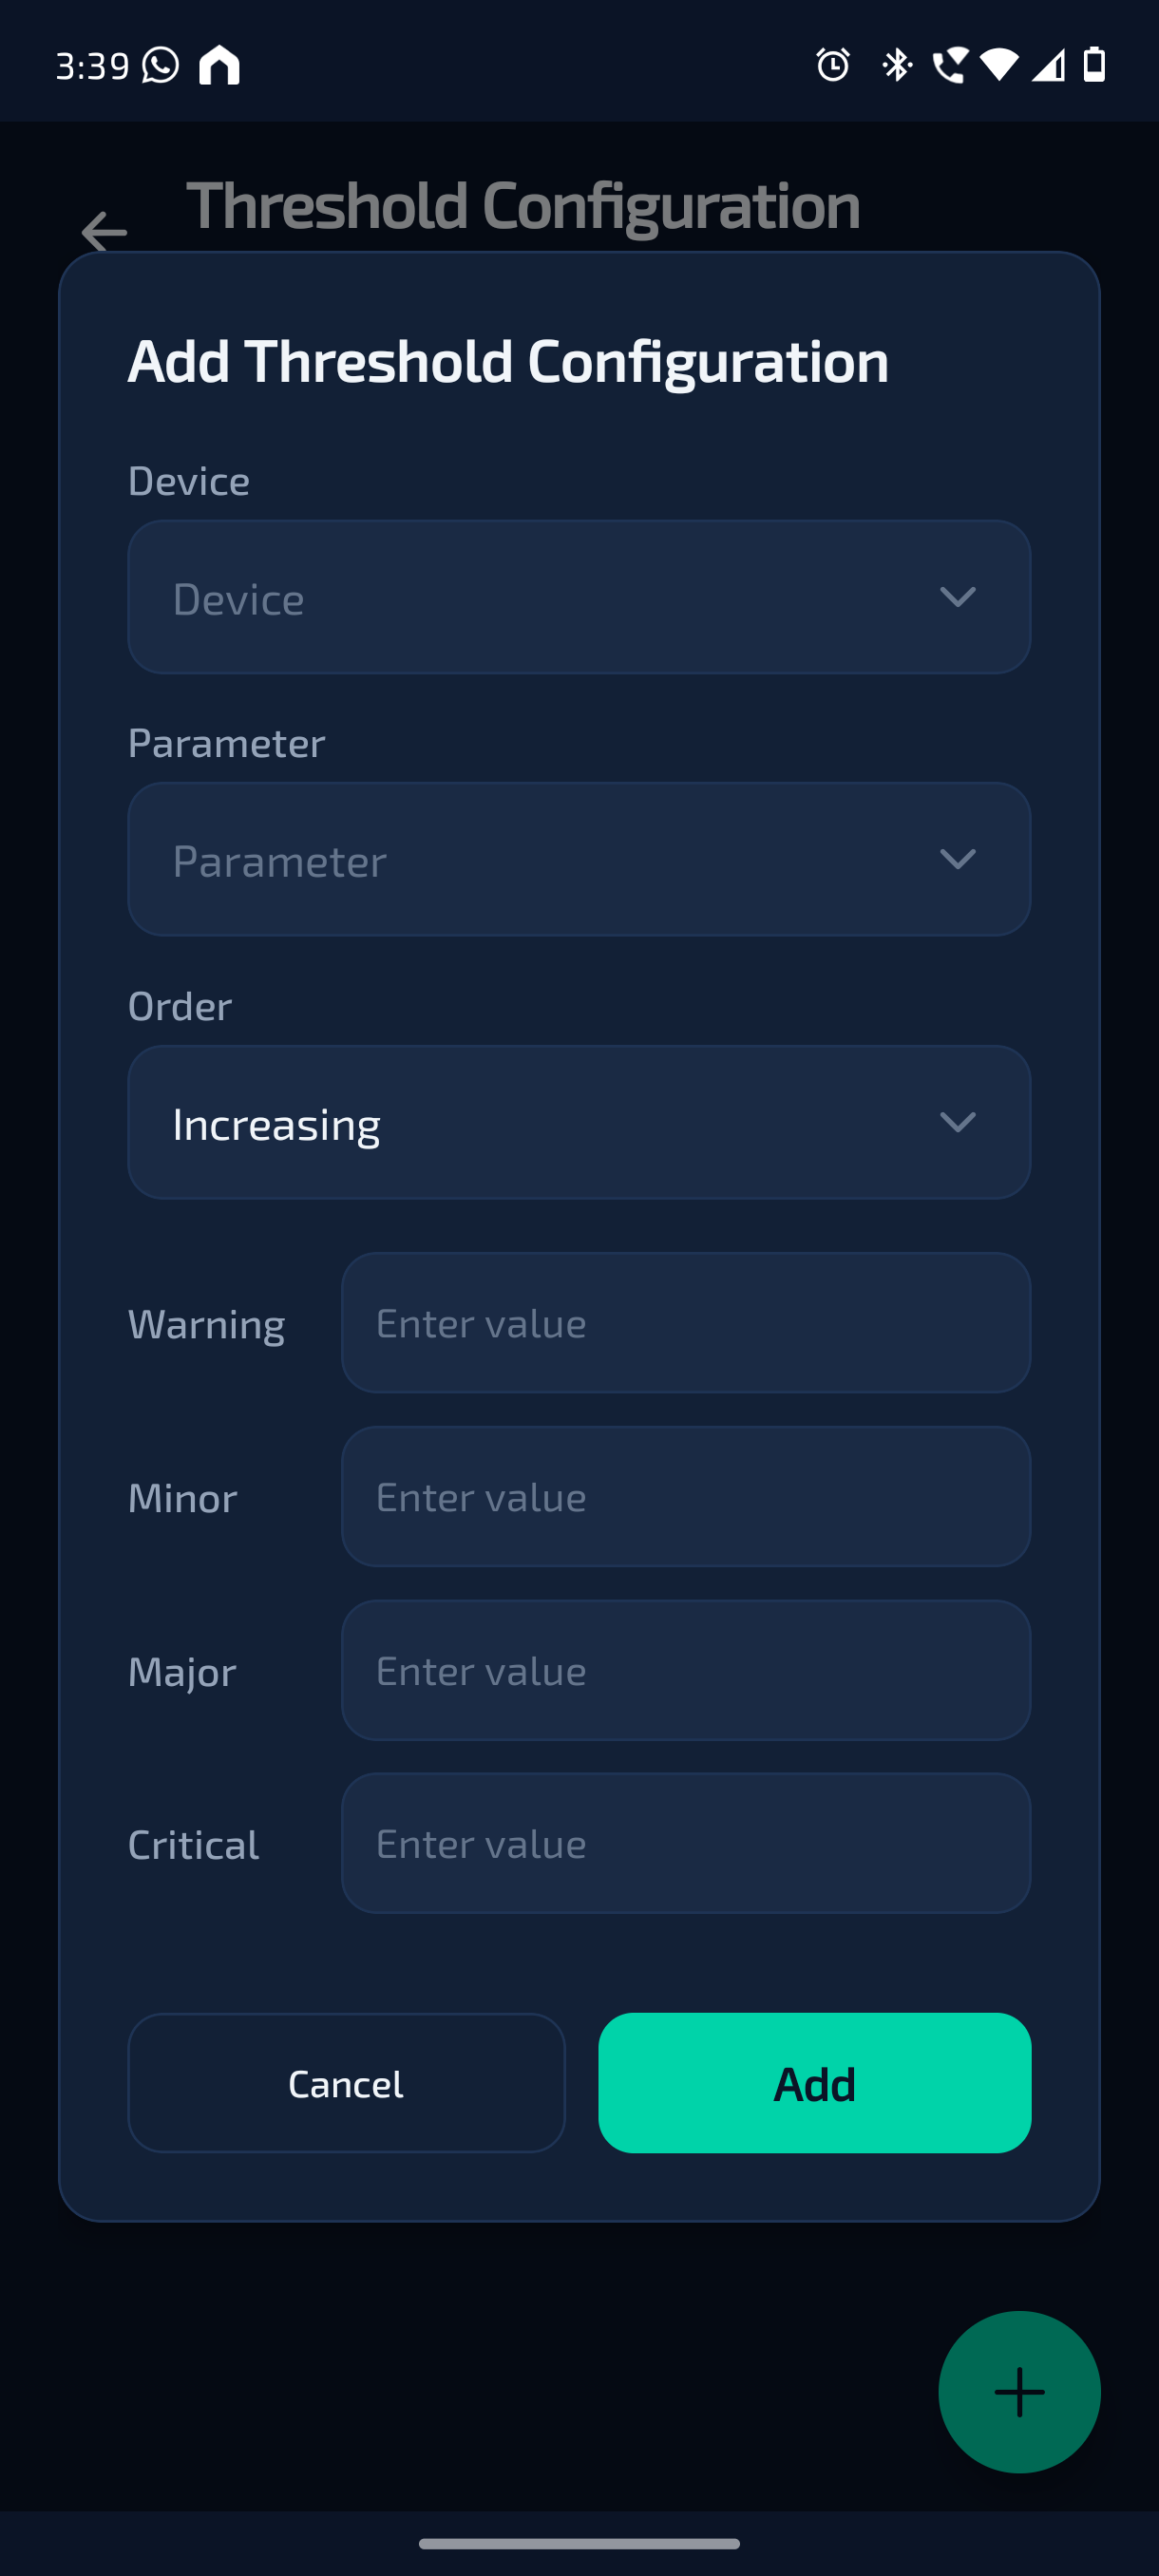
Users can configure threshold levels such as:
- Warning – Initial level of variation
- Minor – Low-level deviation
- Major – Higher-level deviation
- Critical – Serious deviation that needs attention
To add a threshold, tap the + button and enter the required details:
- Select the Device
- Select the Parameter
- Select the Order
- Enter values for Warning, Minor, Major, and Critical
- Tap Add
The Order defines how the threshold should be checked.
Increasing means the severity increases when the parameter value goes above the configured limits.
Decreasing means the severity increases when the parameter value goes below the configured limits.
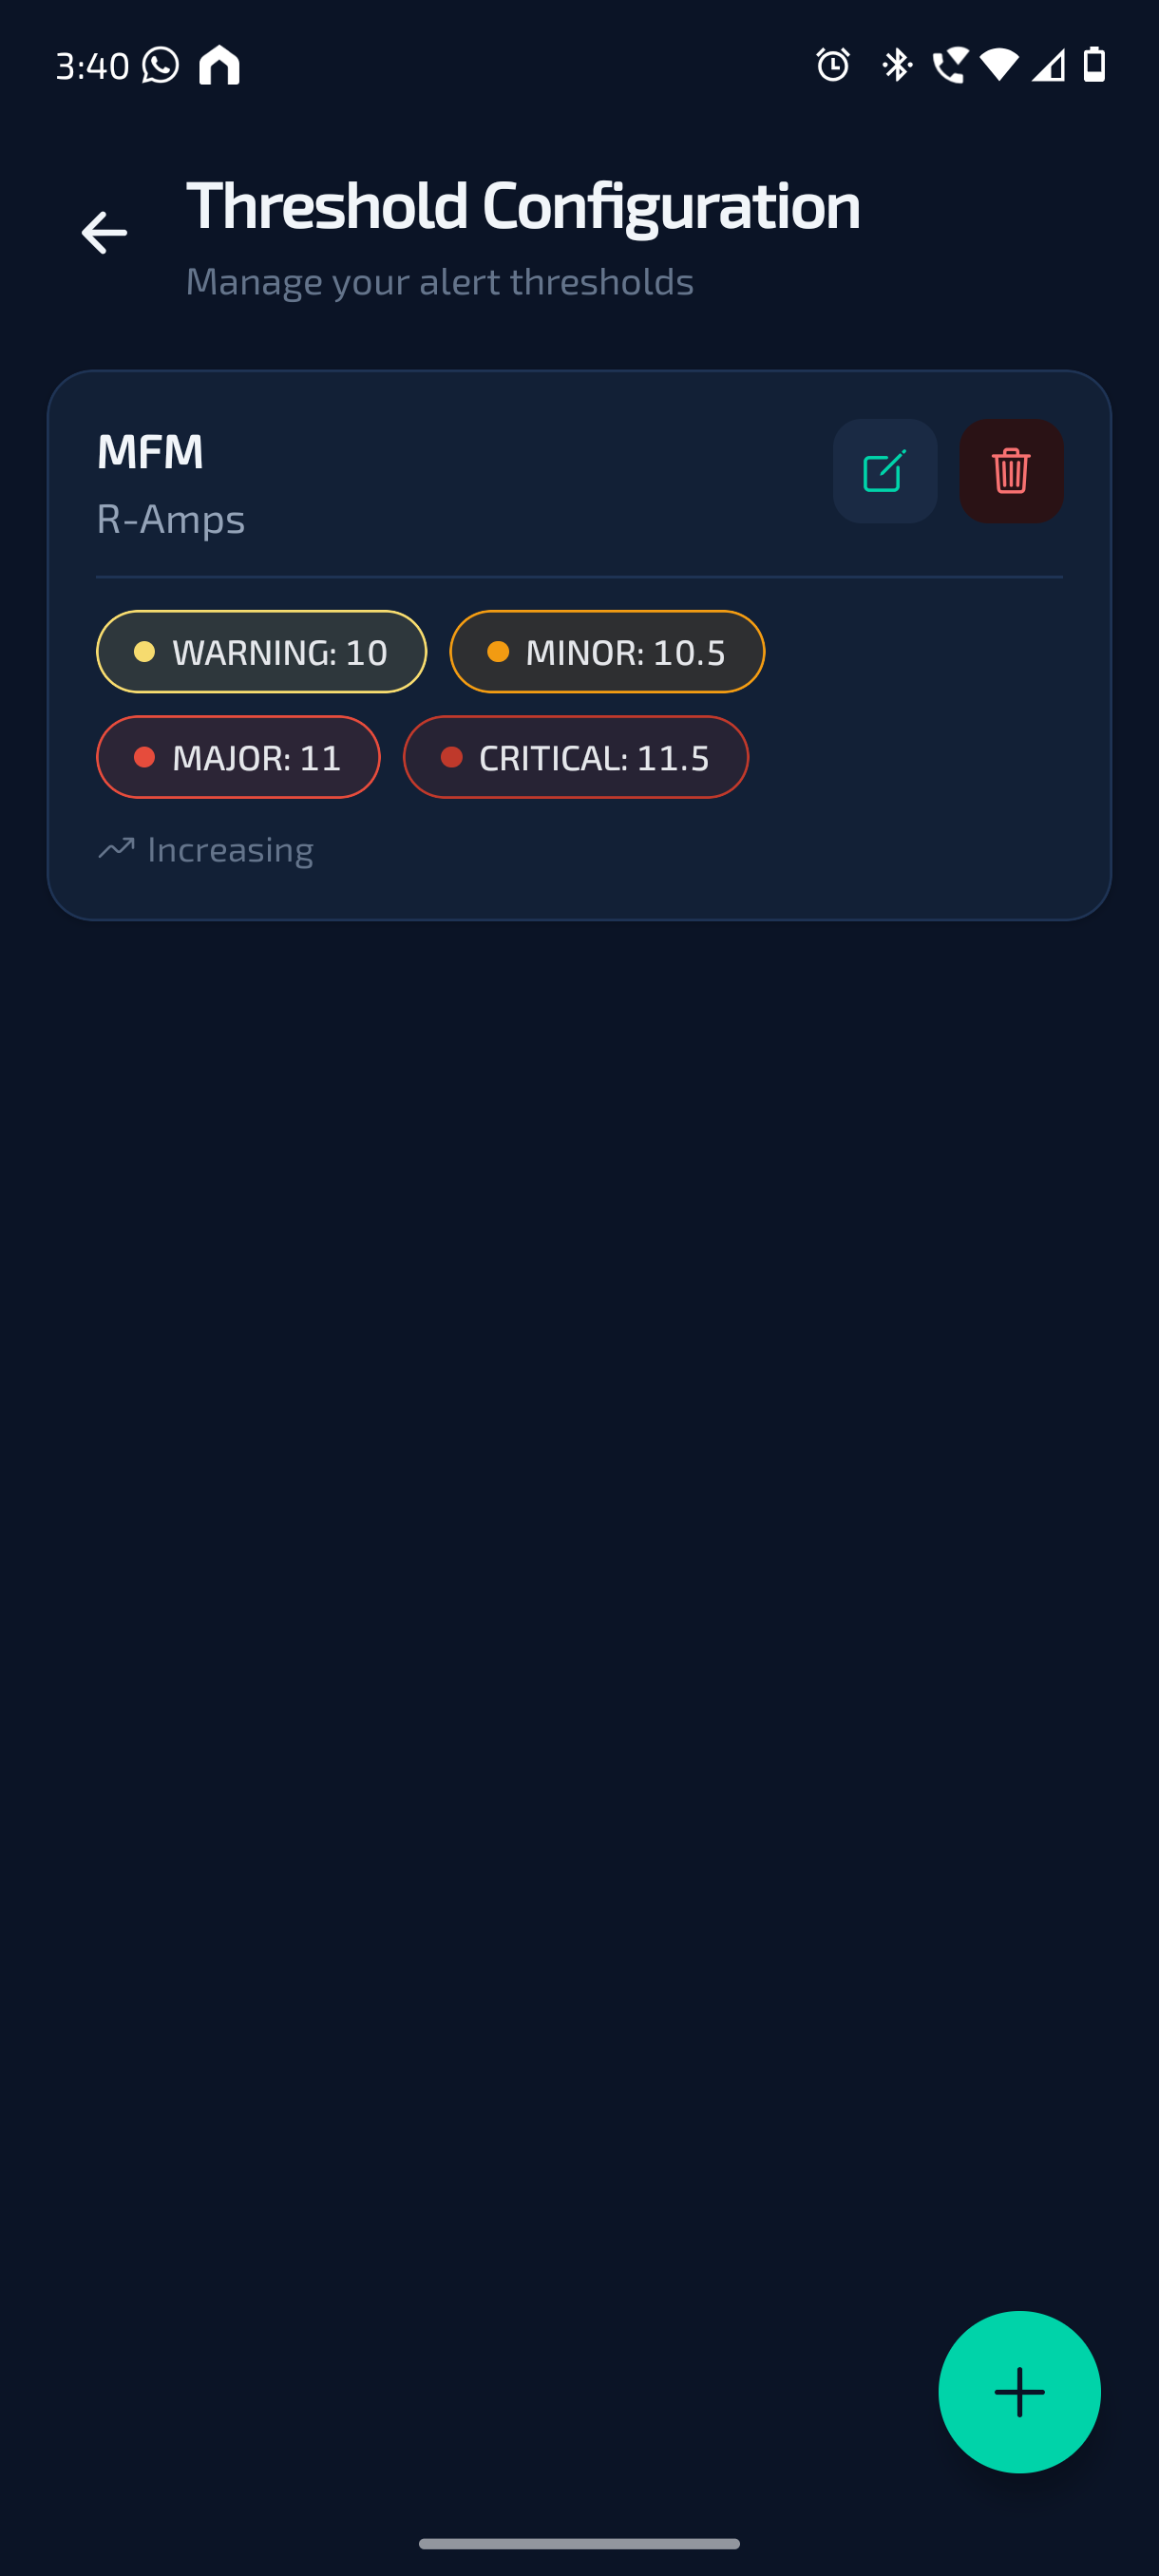
After a threshold is added, it will appear on the Threshold Configuration page. Users can edit or delete the threshold using the available action buttons.
When a report is downloaded, values that cross the configured threshold levels will be shown with colour changes according to severity. This helps users easily understand where and when important variations occurred.
Note: This threshold configuration is used for report highlighting only. It is not used for alert or notification setup.
¶ Scheduled Reports
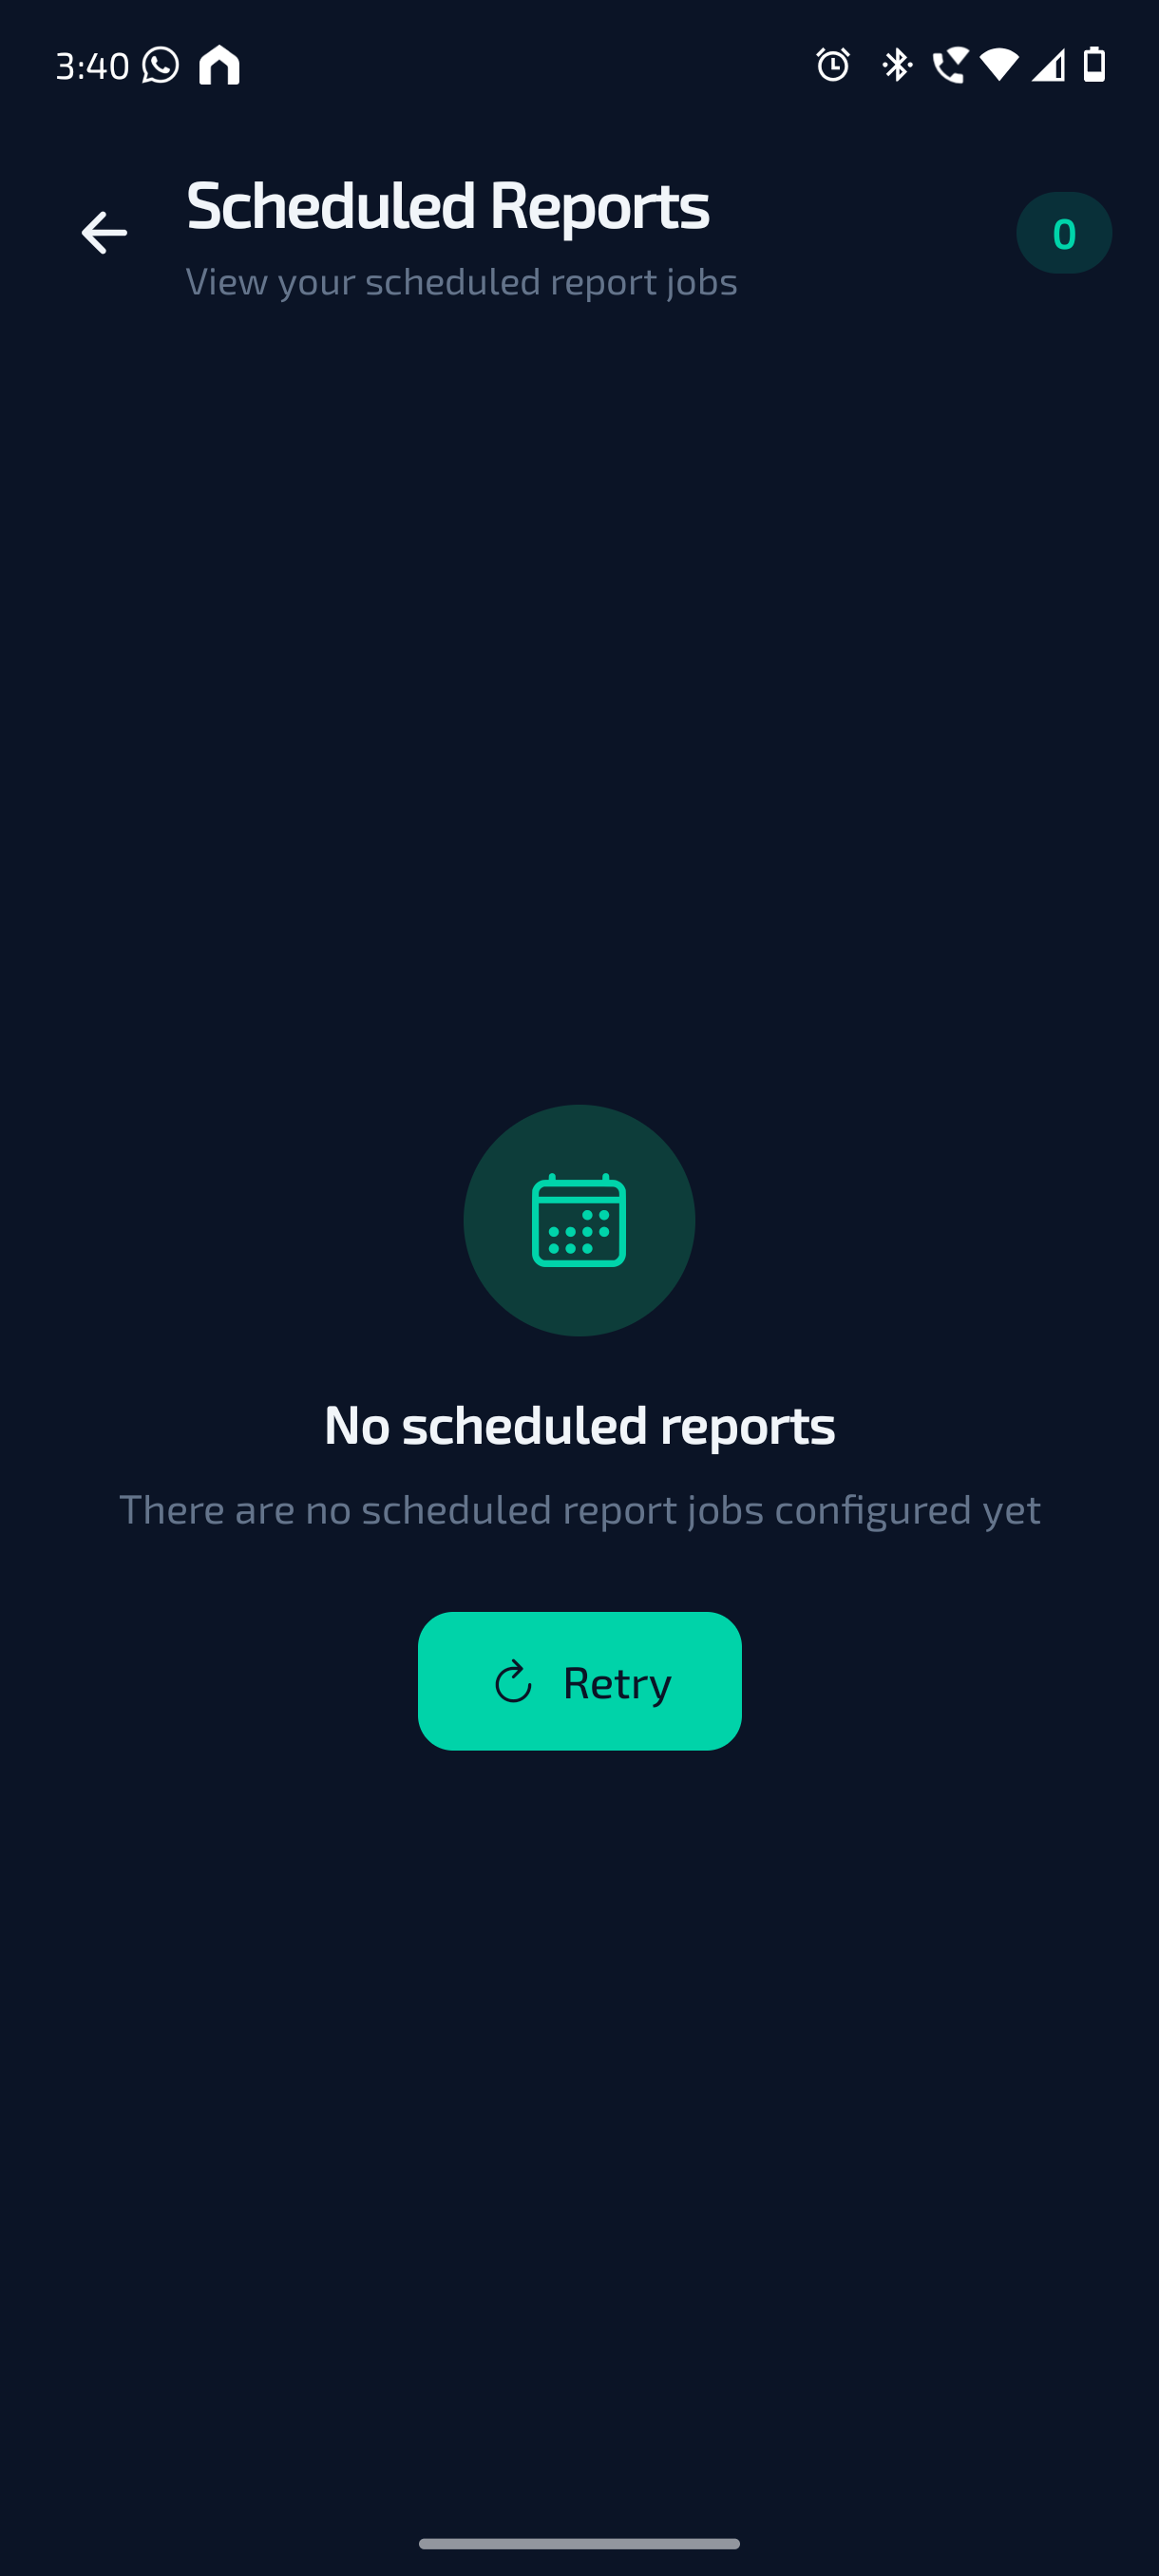
The Scheduled Reports page displays report schedules configured for the account in the web. Scheduled reports are used to generate reports automatically at predefined intervals. If no scheduled reports are configured, the page will show No scheduled reports. The Retry button can be used to refresh the page and check again.
¶ Activity Logs
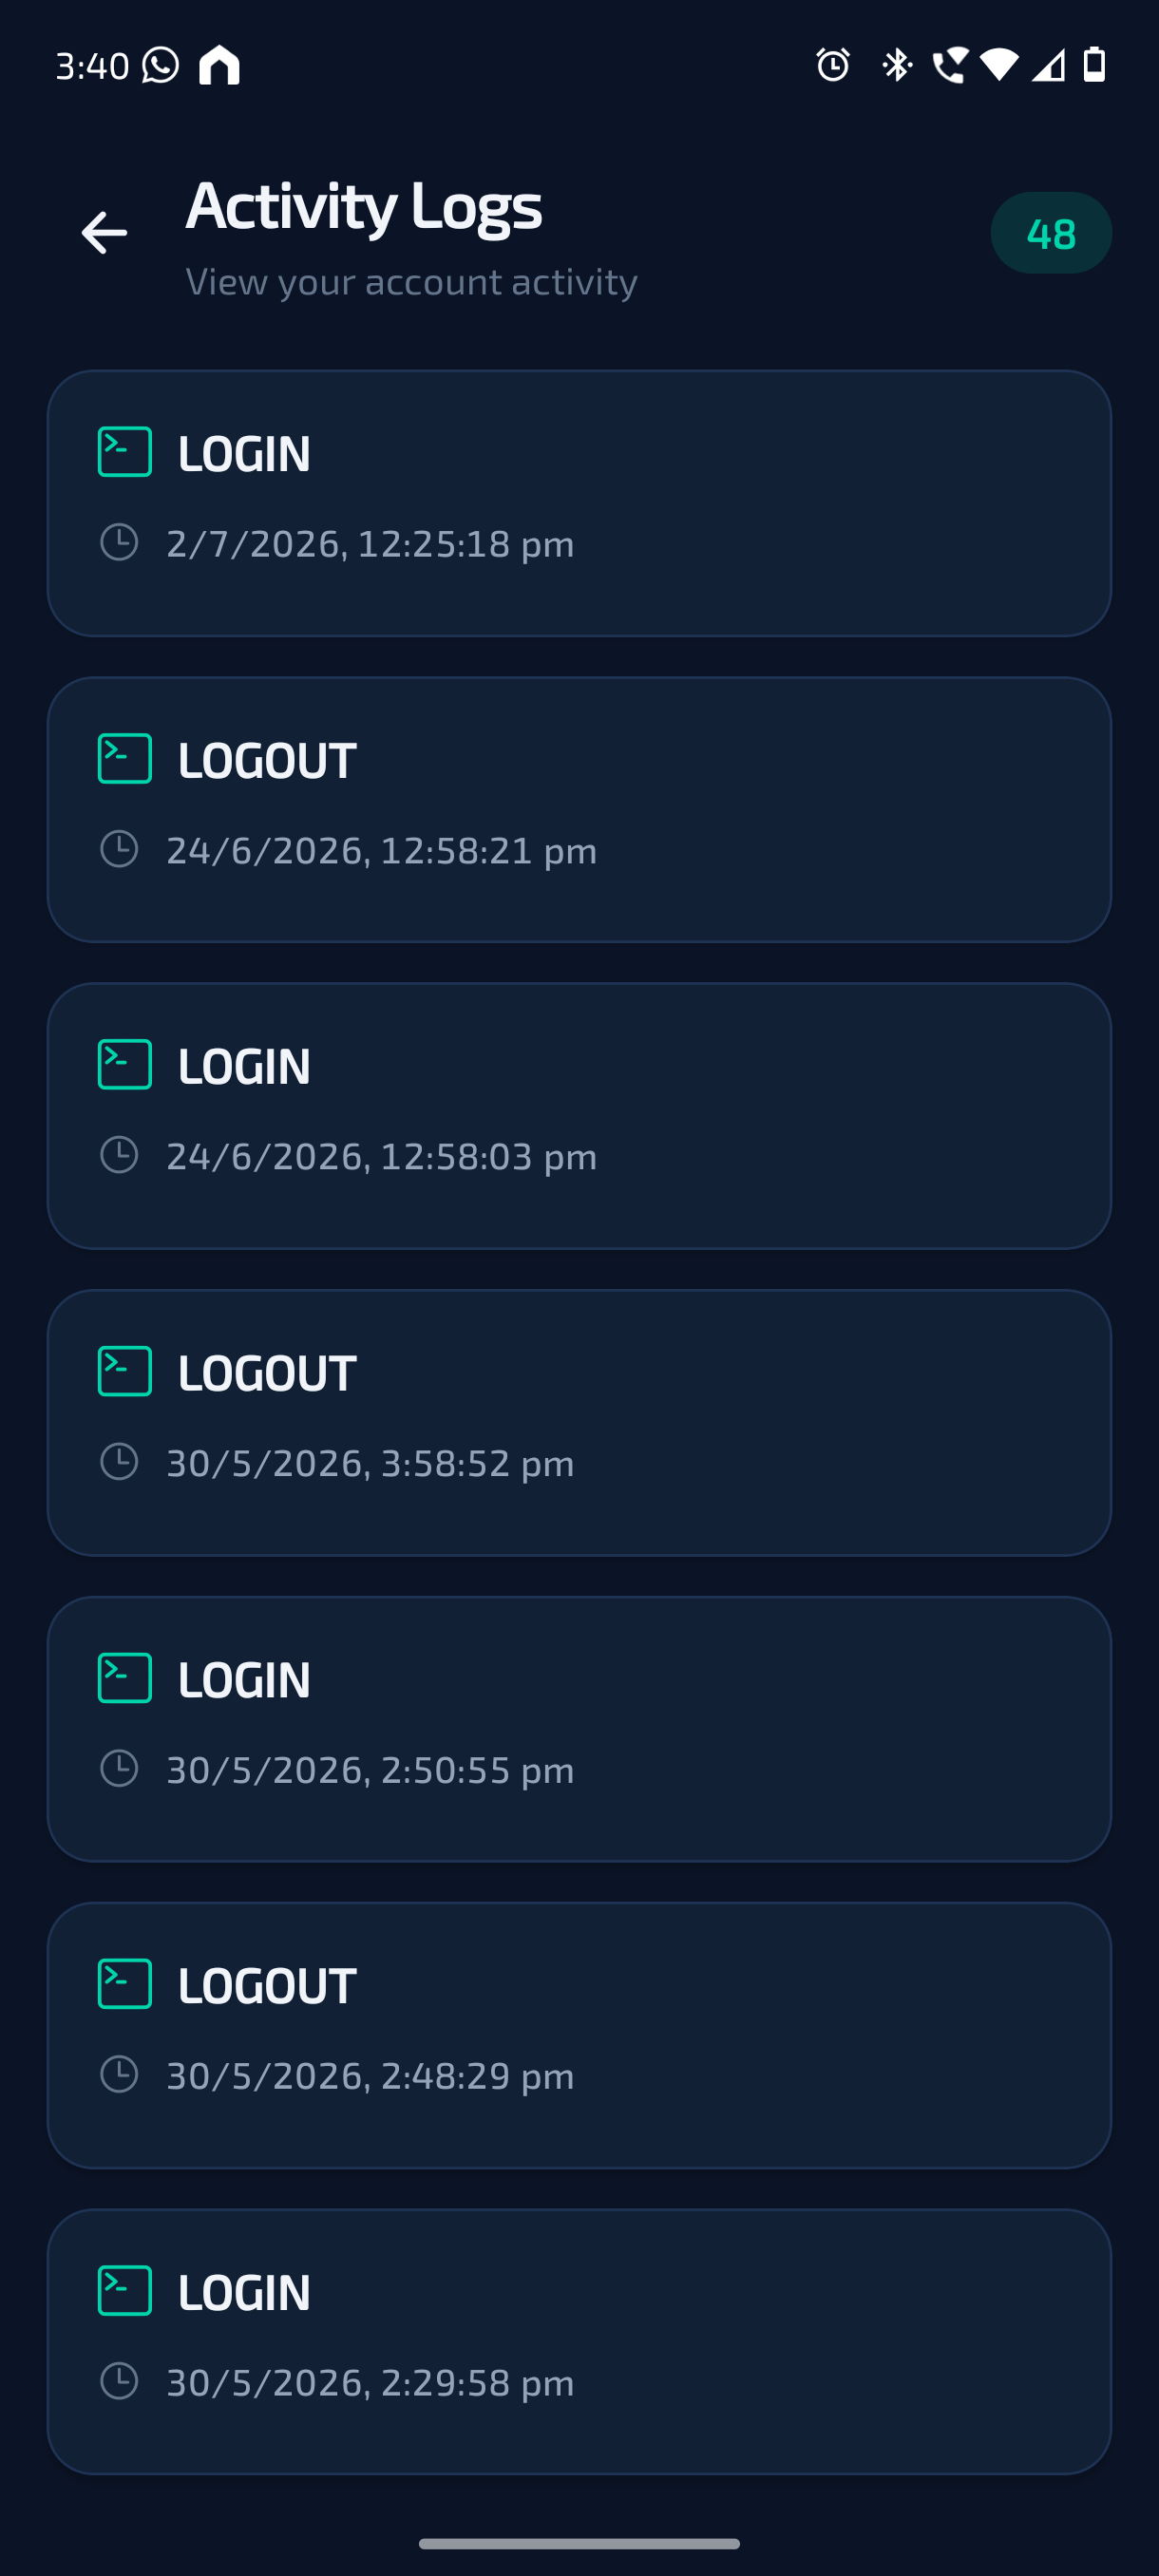
The Activity Logs page shows account activity records. Users can view activities such as login and logout events along with the date and time. This helps users review recent account access and basic activity history. The number shown on the page indicates the total available log entries.
¶ FAQ
The FAQ page contains answers to commonly asked questions about the V-VAC Mobile App. Users can search for a question using the search bar. Tap any question to expand and view the answer. The FAQ section helps users understand common app features such as Home, Devices, Reports, Alerts, Aggregation, and other basic functions.
¶ Feedback
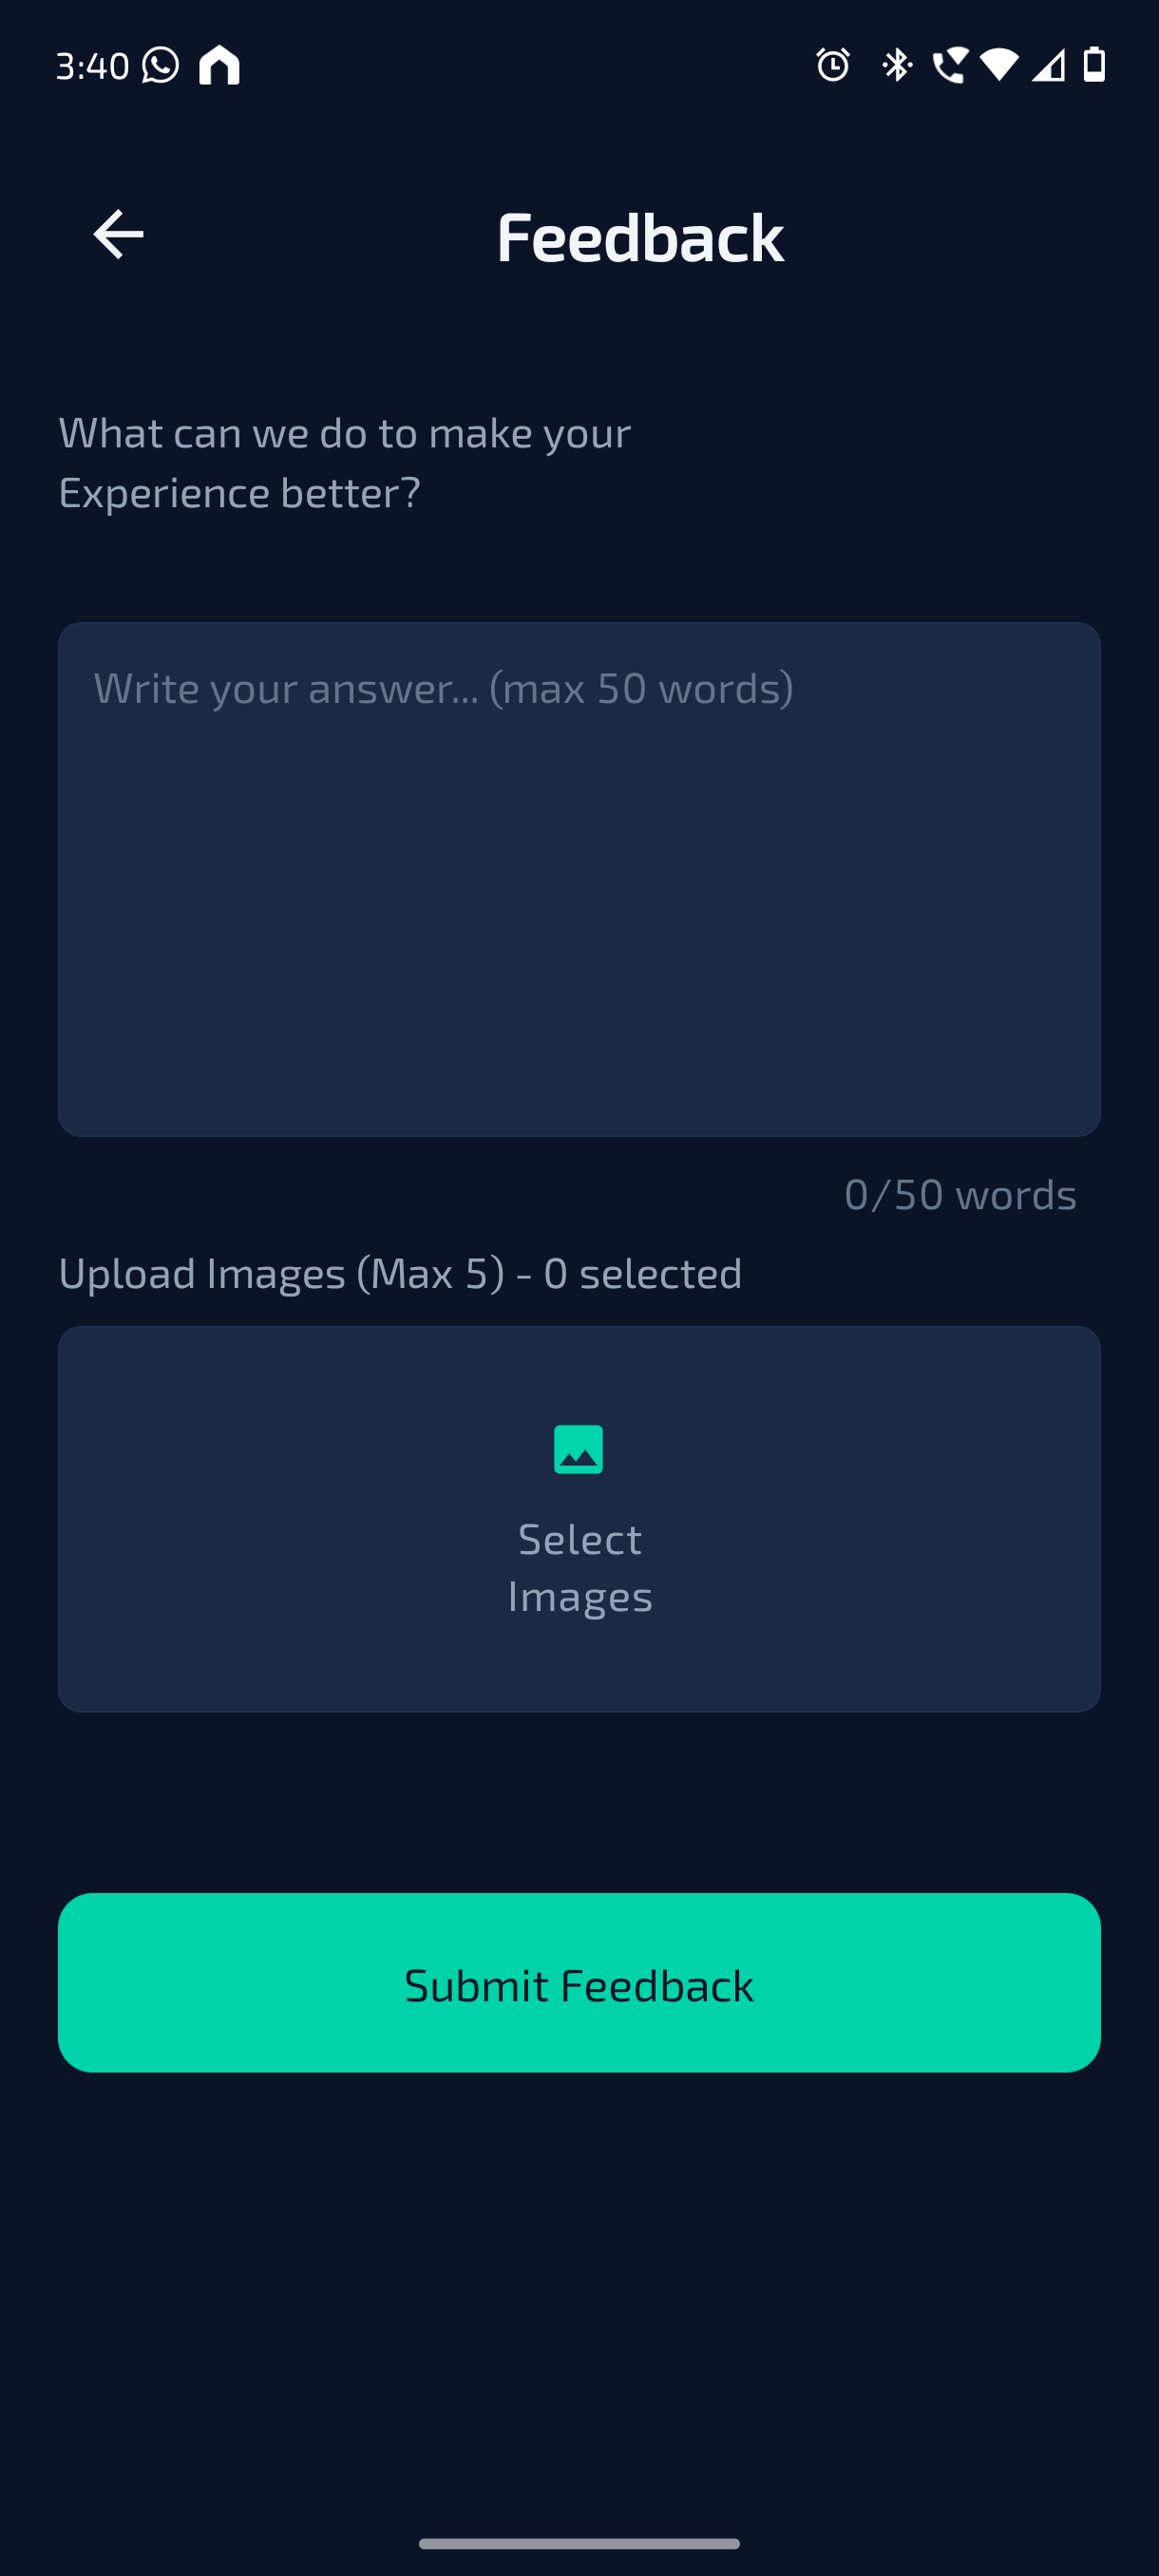
The Feedback page allows users to share comments, issues, or suggestions with the V-VAC team. Users can type their feedback in the text box and upload images if required. Up to 5 images can be uploaded, depending on the app limit shown on the screen. After entering the feedback and selecting any required images, tap Submit Feedback. This option can be used to report issues, suggest improvements, or share user experience comments.